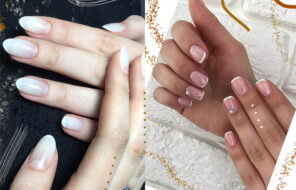
Shiny, strong, and long-lasting… who doesn’t love gel nails? The best part is that you can get your own gel manicure at home if you want to. It’s a more involved process than simply painting your nails, but once you get good at it, your nails can always be shellacked to perfection. If you’re particularly ambitious, you can even try doing your own sculpted gel extensions at home!
You’ll have to pick up some essential tools first, but once you have everything, you can save yourself hundreds of dollars a year by doing your own gel manicure! To get you started, we’ve put together the most comprehensive guide imaginable for gel polish, poly gel extensions, and regular gel extensions. We included tips on what products to buy, a step-by-step guide, as well as some important troubleshooting tips.
In this article:
- What You’ll Need to Do Your Own Gel Manicure
- Doing Your Own Gel Nails Step-By-Step
- Doing Your Own Sculpted Gel Nail Extensions
- DIY Gel Nail FAQ
What You’ll Need to Do Your Own Gel Manicure
Gel nails are a little different from regular nail polish. The polish is made of polymers and monomers that bind and harden only after they’re exposed to UV light. Because of that, you need to have a light source, the special nail polish, as well as a few other must-have manicure tools.
We highly recommend purchasing a gel nail kit, like the Gel Polish Pro Kit from Red Carpet Manicure. The kit includes an LED lamp designed specifically to cure gel nail polish, a red LED nail polish, a base coat, a topcoat, a polish remover, a pre-manicure cleaning solution, an adhesion-improving nail dehydrating liquid, and cuticle oil.
Alternatively, you can always purchase an LED light and nail polishes separately, along with an acetone-based polish remover, isopropyl alcohol, and a special gel base coat, and a topcoat.
Finally, you’ll also need a few tools just to help you achieve a great manicure! These include a nail buffer, cotton swabs, cotton pads, and maybe even a cuticle remover if you want to go all out.
Doing Your Own Gel Nails Step-By-Step
Once you have all of your tools prepared, it’s time to get started! Get situated somewhere comfortable, and maybe put on a TV show in the background. If you’re doing your own nails, we recommend working on one hand at a time. If you have a friend to help you, however, you can speed up the process by having them paint one hand while the other is in the lamp.
- Clean and Shape
You want to start every manicure by first washing your hands (and even soaking them in warm water) and filing them into a shape that you like. If you wish, you can also push back your cuticles or use a cuticle remover.
- Buff
Then, your next move should be to rough up your nails a little with one of the medium-rough sides of a nail buffer (usually called side 2 or 3). You’ll want to buff the nail plate directly until the natural shine is gone from your nail. Don’t buff so much that you damage the nail but just enough so the gel polish has a textured surface that it can grip.
- Prep
With your nails cleaned and shaped, you still need to do a little more prep. Any oil, dust, or dirt on your nails is going to create a gap that can cause your gel nails to slide off or chip later on. Using isopropyl alcohol or an adhesion enhancer, wipe down your nails to make sure they’re totally clean and dry.
- Base Coat
Next, apply a very thin layer of your base coat to each nail. Be very careful not to get any of the base coat on your skin or on your cuticles, as that can hurt the seal over your nails. If you do get some on your cuticles, wipe it off with a cotton swab.
- Cure
With all of the nails on one hand covered in base coat, place your hand into the LED lamp, and allow that layer to cure for 30-60 seconds, depending on your lamp.
- Paint
Once your base is cured, you can now paint the nails! Make sure there isn’t too much polish on your brush, and slowly apply the polish from base to tip. Aim for a thin layer. It’s okay if the polish is a little see-through in that first layer.
Gently apply the polish to the tips of your nails, as well (but don’t wrap it around to the underside of the nail). You may want to switch to a dotting tool or a smaller nail brush for this part since the nail polish brush can be a little big and messy.
Be very careful not to get any of the polish on your cuticles or nail bed. If you do, wipe it off with a cotton swab or with a small nail polish brush dipped in alcohol or acetone (although if using acetone, be extra careful that it doesn’t disrupt your polish). - Cure and Apply Second Layer
Cure your hands under your LED lamp. Depending on the shape of the lamp, you may want to cure your thumb separately, and you might even want to do a second cure with your hand in a claw shape to properly harden the tips.
Once that’s done, apply your second coat of polish in the same manner as you did the first and cure again. If you think that the color of the polish isn’t opaque enough, you can do a third coat and then cure that third coat, as well. - Topcoat
Finally, with all of that out of the way, you can do a final layer of topcoat. Apply the topcoat as you did the base coat and nail polish, and make sure to also apply it over the painted tips. Cure that topcoat. When you take it out of the lamp, you’ll notice that the gel is a little sticky.
Using a cotton pad soaked in alcohol or a post-manicure cleansing liquid, wipe down the nail to remove the stickiness. That’s all there is to it! You can now move on to your other hand.
Doing Your Own Sculpted Gel Nail Extensions
The world of DIY gel manicures isn’t just limited to gel polish. It requires a bit more effort and some special tools, but if you’re very handy, you can even do your own gel nail extensions at home.
What You’ll Need
To do your own gel nail extensions, you’ll need a lot of the same equipment that’s used in gel polish manicures. That includes an LED light, a nail buffer, isopropyl alcohol, disposable cotton pads, and swabs.
You’ll also need the gel that’s used to create the nail extensions, as well as a brush to apply it, its various primers, bases, and topcoats, and any gel polish colors or nail art accessories.
Poly Gel is one convenient option that comes in a tube and is often available in a larger kit with the LED and all the other must-haves.
There are also individually sold tubes of self-leveling gel that are more similar to what professionals use in the salon, although they must be purchased along with a special acid-free primer for extensions, as well as a base and topcoat.
If you purchase a larger kit, it’ll come with dual forms, which are nail-like plastic molds used to shape the nail extension from the outside. This saves you some effort sculpting, filing, and buffing the nail, so it’s great for beginners.
Professionals prefer disposable sticker nail forms, which allow them to brush and shape the gel directly over the nail. This means that the outer part of the nail extension then has to be filed down and basically sculpted to achieve a smooth, nail-like look. The benefit is that the gel extensions adhere better to the nails and are less likely to lift or fall off. We’ll explain how to do both methods in our step-by-step guide.
Step 1: Clean, Shape, and Buff
No matter what kind of gel you’ll be using, the first part of your process should be to prep your nails. Just as with the prep of gel polish, your nails need to be clean and dry, with the cuticles pushed back or trimmed.
With gel extensions, it’s even more important that you rough up the nail plate a little with a file, as otherwise, your gel extensions are going to have a much harder time adhering to your nails.
Once you do that, your nails will be covered in a fine layer of nail dust, which you can wipe away with alcohol.
Step 2: Primer and Base Coat
With many gel nail kits, you may have a primer you need to apply first, before the base coat. The primer is an additional drying/alcohol-removing step, so if you have it, apply it lightly and only to the nail plate. Be careful not to let it touch your cuticles. Next, apply a thin layer of your base coat, and cure it in your LED lamp.
Step 3: Nail Forms
Now is the fun part, working with your nail forms! If you’re using a dual form (i.e. a plastic mold), all you need to do is pick up the correct sizes for each one of your nails. Hold the form over your nail, and make sure that it fits perfectly without leaving any gaps.
If you have sticky nail forms, you need to grab the form and fold it a little, so it’s rounded. Then, slip your finger through its hole and make sure its end extends from just below your natural fingertip. Give it a firm press, so it rolls into a claw-like shape and so that the sides adhere to the sides of your finger.
Step 4: (Option #1) Applying Poly Gel to Dual Forms
Compared to what the professionals use, Poly Gel is a little thicker, but it’s otherwise very similar. Here’s how to create your extensions with it, using solid dual forms.
- Pour a bit of alcohol (it’s called Slip Solution in the Beetles Kit we linked to above) into a shallow bowl.
- Squeeze out a pea-sized amount of the gel directly onto your dual form. You might need less for very short extensions, or you can add more if you decide you want longer nails.
- Dip your brush into the alcohol, and use it to start moving the gel around the dual form to create a nail shape. Make sure to use the brush that came with your kit, as it’ll be firm enough to work with the Poly Gel.
- Gently push the gel around until you achieve your desired length, attempting to keep the width relatively thin.
- Make sure not to leave any gaps in the form or along the sides and that it looks nice and smooth from below.
- Once the shape looks neat, you can gently push the form directly against your nail, bringing it as close to the cuticle as you can.
- Once you like your placement, push down on the form gently. Don’t overdo it, or the gel will squeeze out from the sides and get on your cuticles.
- If the tip is looking a little too thick on the inside, use your alcohol-dipped brush to smooth the excess gel upwards to get a thinner tip. It’ll make the nail a little longer, but you can always file it down later.
- If any of the gel did squeeze out from the sides, clean it away with your brush and alcohol.
- Now you’re ready to cure it! Place your finger, along with the dual form, under the lamp.
- Once fully cured, you can gently remove the form from the gentle. It should come off easily. If it doesn’t, cure the nail for a little longer.
Poly Gel kits are usually sold with hard dual forms, which is why this is the method we explain. You can also use Poly Gel with sticky nail forms, mostly following the process in the next section. The only difference is that you would need to dip your brush in alcohol to move the Poly Gel around since it’s not as fluid as self-leveling gel.
Step 4: (Option #2) Applying Self-Leveling Gel to Nail Forms
This is the preferred pro technique, and while it requires a lot more finesse, many find that it gives more long-lasting and better-looking extensions. To see this process in action, check out this video from Nail Career Education.
- To start, simply dip your brush in your tube of gel, and remove a pea-sized amount of product. Smooth the gel over your nail, starting slightly above the cuticle.
- Since the gel is self-leveling, it will be easy to slowly and gently push it down closer to the cuticle, while if you bring it in too close right at the start, it’ll end up seeping into or over the cuticles instead.
- Gently spread the gel over your nail plate in small, circular, or side-to-side motions, making sure to achieve complete coverage all over the nail plate.
- Pick up more gel with your brush, and bring over the natural tip of the nail so you can start building the extension over the nail form.
- Using dragging or back and forth motions, coax the gel gently over the nail form until it reaches slightly past your desired length. Remember that it doesn’t need to be too perfect since you’ll be filing and refining it later on.
- Once you have a smooth, not overly thick layer that you’re pretty happy with, cure the gel in the lamp (the amount of time depends on the kind of gel you have).
- After curing, add more gel as necessary to build up the strength, refine your shape, and fill in any gaps.
- Cure that second layer.
- Now you can move on and work on your other fingers, following the same process nail by nail.
Step 5: Filing Time
With all of your nails built, attached, and cured, you’ll now want to file them. Before you just get into that, though, wipe them down with some alcohol to remove the sticky top layer. You may also want to put on a face mask to avoid inhaling the acrylic dust, although this is primarily a risk for nail techs who are at risk of breathing in the acrylic dust all day long.
Then, with a regular nail file, begin filing. With Poly Gel nails, the outer part will already be smooth and shiny, so you just need to file the edges to get them into a shape you like.
With traditional gel, start by smoothing out the outer part of the gel nails, as necessary. Always keep the file moving, and concentrate on keeping your motions rounded, so that the file is always on a diagonal angle against the nail. What’s important is that you don’t have any “shiny” spots where you missed filing altogether since those are signs of uneven pockets. If those pockets are too deep, you can add more gel and cure them again to fill them.
Then, file the tips of the extensions to achieve the shape you’d like, just as you would if you were filing regular nails. Finally, you can do a smoothing buff to achieve a nice finish.
Step 6: Topcoat
Finally, with your nails beautifully buffed, apply a topcoat to seal everything in and add a beautiful shine. You can also apply a coat of gel polish first if you want to change up the color of your extensions. Either way, make sure to cure each layer of gel polish or topcoat, as you would in a gel polish manicure.
If you opt for just a topcoat, you can always play around with regular nail polish colors. You can even switch ‘em up and keep your extensions intact by making sure to only remove them with acetone-free nail polish remover. With your gorgeous extensions in place, finish things off with a nice layer of hand cream or cuticle cream to give your nail bed a little bit of love.
DIY Gel Nail FAQ
There’s a hack some DIY fans like to do, where they first apply their gel base coat, cure it, apply a regular nail polish, and then apply a gel topcoat. By sandwiching the regular nail polish between the gel base and topcoats, they hope to end up with a long-lasting gel manicure using a color that they don’t own in a gel format.
This method can sort of work, but it has some issues. There’s the potential that your nail polish won’t be completely dry before you apply that final gel topcoat (nail polish doesn’t dry completely for 24 hours, even if it seems dry). So, if you do everything in one day, you end up sealing in partially wet nail polish. This can end up lasting even less time than a regular manicure!
However, if you wait a full day to allow your regular nail polish to dry, applying a gel coat a day after may give you a slightly longer manicure than normal, although don’t expect the longevity of a full gel manicure.
Yes and no! The well-known, mainstream brands like CND, OPI, and Sally Hansen formulate their gel nail polishes to cure completely when used in conjunction with their lamps.
In a professional salon setting, a great manicurist is going to make sure that the light they’re using is designed to work with the nail polish. This is because a pro can’t afford to have any issues with curing!
When it comes to using a lamp at home, you can have a bit more freedom to experiment since faster chipping won’t be a disaster. While you’ll probably get the best results with matching sets, you may discover that your LED lamp still cures polishes from a different brand, but that perhaps you have to extend the curing time.
There are some common pitfalls to doing your own gel nails. Maybe the polish seems to wrinkle and slide off or peel. Here are the reasons why these issues may occur and what you need to do to avoid them the next time.
Wrinkling
If your nail polish seems to bunch up or wrinkle a few hours after you’ve finished doing your nails, chances are you applied the polish too thickly. Because of that, the gel doesn’t manage to cure completely, and it slides down a little to form a wrinkle. This can be a problem since the wrinkled layer is weak, and it’ll peel away easily. Next time, just be careful to apply it in thinner layers.
Peeling
Gel polish can sometimes start peeling in patches or even in one single layer, way before you’re ready for it to come off. This is usually a sign of inadequate prep. Maybe your nails were too smooth, and you didn’t buff them enough. Some people choose to buy an electric nail file, which does an even better job of roughing up the nails, although it can also be more damaging.
Another issue might be that you had some acetone on your nails, which can disrupt the polish and prevent adhesion. That’s why we recommend cleaning the nails with alcohol at the start.
Another potential issue is that you didn’t clean your nails enough, and there was still oil residue on them when you got started. Alternatively, maybe you touched your skin or hair after cleaning them, which ruined all that hard work of cleaning.
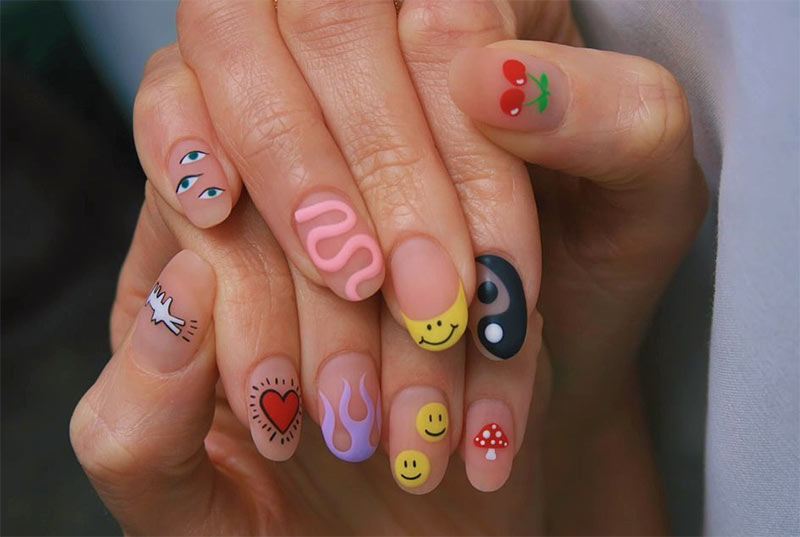
Photos via @imarninails, Instagram