- Box braids are protective styles that imply creating three-strand plaits by sectioning squared boxes.
- There are different sizes of box braids, and you can style them either with or without extensions.
- Box plaits typically stay in the hair for six to eight weeks, so proper care like regular washing is vital.
While there are a few tips and tricks to keep your box braids fresh, as well as best practices to protect your hair while in braids, this is a great way to express your personality. We have created the ultimate guide to box braids for you, explaining what they are and the main types, how to do box braids, how to maintain and wash them, as well as how to remove box braids once you change your mind.
In this article:
- What Are Box Braids? History and Origins
- Types of Box Braids
- How to Do Box Braids
- How to Wash Box Braids
- How Long Should You Keep in Your Box Braids?
- How to Remove Box Braids
- Do Box Braids Harm Your Hair?
- How Much Does Getting Box Braids Cost?
What Are Box Braids? History and Origins
Box braids have been around for centuries. But thanks to social media and the power of visuals, more and more people are being exposed to a hairstyle that has often been considered a staple within the African diaspora.
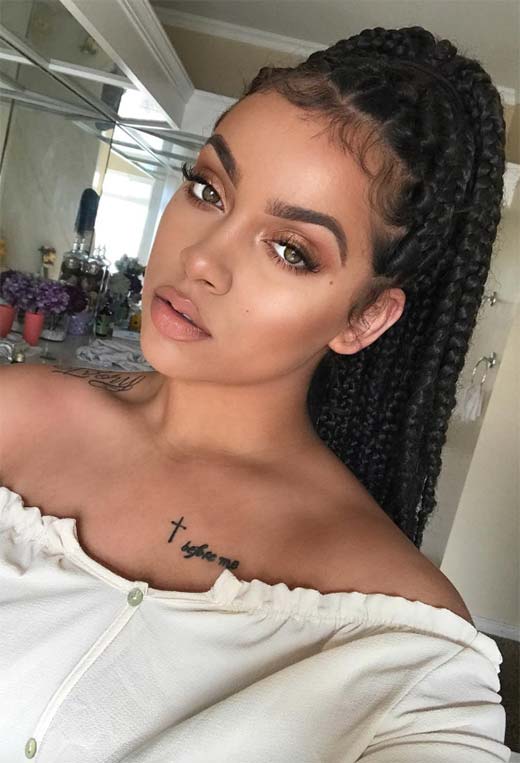
One of the most famous protective styles, box braids are three-strand individual braids styled by sectioning squared-off parts or boxes, hence the name. As compared to other braiding styles such as cornrows, box braids offer more versatility because the individual braids are not woven tightly to the scalp. This means that after the braids have been created, the wearer can then further style them in a myriad of ways.
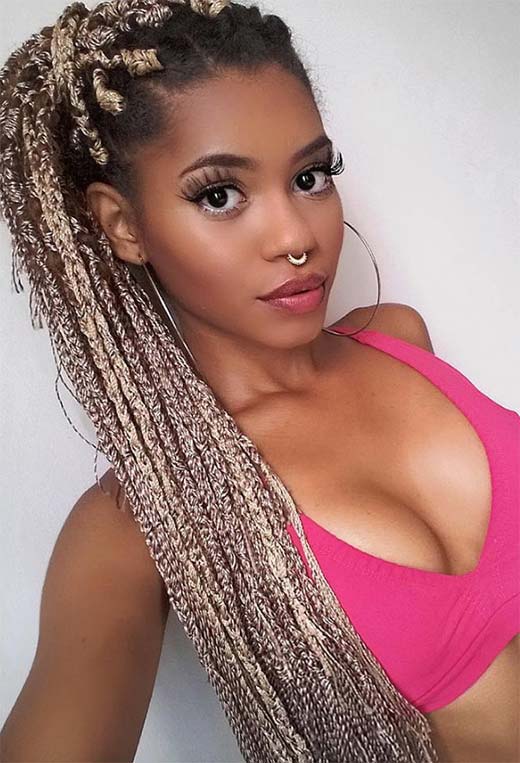
Depending on your style goals, you either use only your natural hair or also add extensions to create the desired length, texture, or color. While you can use a range of colors or extensions (like crochet hair synthetic extensions), box braids are also a time commitment with a minimum of three hours for large-width braids and as many as 10 hours for micro-width braids.
Origins
For many African cultures, braiding styles were a way to distinguish between cultural groups. And some experts believe that the more intricate a braiding style was, the more it expressed the wealth of the wearer. It’s important to note that there are many different braiding styles, and box braids are just one of many.
Box braids can be traced as far back as 3,000 years ago from the Himba people of Namibia and are a derivative of the Eembuvi braids as well as the chin-length bob style braids seen on women from the Nile Valley.
Braiding has always been viewed as a social activity, with elders teaching younger children how to braid hair. These valuable social skills were passed down to generations and continued to be important even in other parts of the world where Africans and their descendants lived, such as the Caribbean and the Americas.
Often, braiding hair was a way to share messages – specifically escape routes – to help slaves reach freedom. And many times, accessories such as shells, beads, and jewels were added to braids to further establish important messages such as wealth or coming of age.
While we know the style as “box braids”, the reality is that this name wasn’t given to the braiding style until the mid-1990s when Janet Jackson often wore the style in movies and music videos.
Box Braids and Cultural Appropriation
Unless you’ve been living under a rock, you probably were aware of a not-so-new hair trend that took the mainstream beauty world by storm – and not necessarily for the right reasons. While box braids are just one type of braid, another classic braiding style, the cornrow, was rebranded as “boxer braids” when seen on the likes of Khloe and Kim Kardashian and other people that weren’t of the African diaspora.
So, what was the big deal?
The issue wasn’t so much that a person who wasn’t of African descent was wearing a classic African braid style, but that the media praised and lauded the style as if it was a new invention – while ignoring that often when people of the African diaspora wear traditional hairstyles, they’re often mocked and called ghetto or unprofessional for doing so.
Likewise, even Khloe’s sister Kim came under fire more than once for rocking another iconic African braided hairstyle and conveniently crediting a white person, Bo Derek. While Bo Derek did look nice in her Fulani braids, she was not the originator of the style since it also has African origins.
So, what’s the takeaway?
No one is barred from wearing braid styles. But at least be culturally sensitive to understand that what may seem like “no big deal” can be problematic and come across as erasure when many people of African descent are either name called or find themselves running afoul of work and school dress codes for wearing a hairstyle that’s emblematic of their culture.
Types of Box Braids Based on Size and Texture
The fun thing about box braids is that you can make them as narrow or as big as you like – as long as you’re willing to sit in a chair long enough to have your hair braided! So, considering that the sky is the limit, what can you do (and not do) with box braids in terms of width and texture?
Chunky or Jumbo Box Braids
If the thought of sitting 10 hours to get your hair braided makes you faint, don’t worry, we get it! In that case, you should focus on larger box braids, often known as chunky or jumbo box braids. These braids are the quickest to braid (or have installed), but they do come with drawbacks. With braids in general, you should avoid a braider who braids too tightly, as it can lead to hair loss if you consistently wear this style.
Jumbo box braids can pose the risk of leading to more hair loss because of the added weight from the extensions being installed to each small section of hair. However, jumbo box braids can be harder to maintain in terms of keeping the roots neat.
“Normal”-Width Classic Box Braids
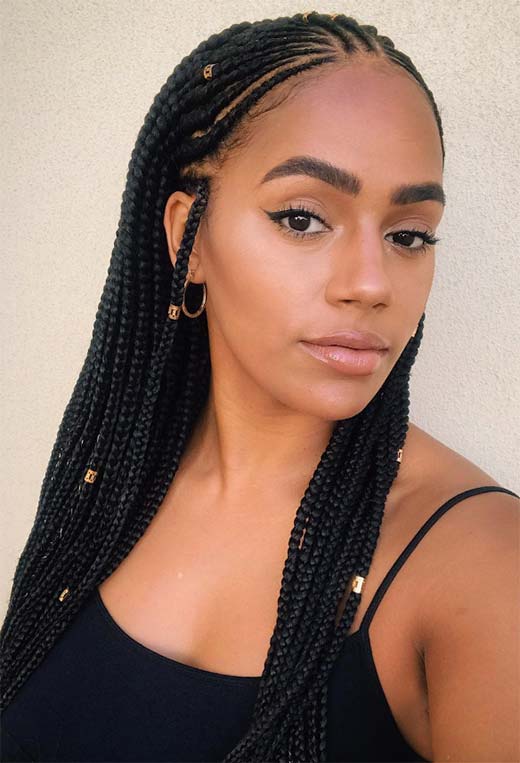
Also known as pencil-sized, these box braids are a medium width and are an ideal middle of the road option for someone who wants box braids but is concerned that jumbo braids may be too weighty yet doesn’t want to sit for micros.
Micro Box Braids
As the name implies, micro box braids are truly tiny in width. In addition to taking the longest to have installed, there’s also the risk of damaging your hair follicles as you’re now using less hair to hold the weight of each micro box braid.
So, much like with jumbo braids, you need to be sure that your stylist doesn’t braid too tightly. However, micros do give you more scalp access, making it easier to clean your scalp regularly.
Box Braids and Hair Texture
While anyone can get their hair braided, the reality is that the width may depend on the state of your hair. Box braids can be worn by any hair texture, but the thickness of your hair will also dictate how large or small your braids should be.
If you have very thick hair, micros are not recommended, as it will potentially create too much volume and weight as your stylist attempts to install the small micro braids in your hair. As a general rule, those with thinner hair should focus on smaller box braids, while those with thicker hair should opt for medium or larger braids to minimize bulk.
How to Do Box Braids with and without Extensions
Although box braids can seem intimidating, there’s no reason that you can’t install your braids – regardless of whether you decide to create braids with or without extensions. While it will take time, and you might need practice to properly keep them even and neat, learning how to install box braids is a valuable skill that can save you money in the long run.
When done properly, installing your braids could mean that at most, you only pay for the cost of braiding hair. In contrast, having them installed by a professional braider can cost you anywhere from $65 to 300 dollars.
How to Do Box Braids on Your Own Hair
Whether you feel your hair is long enough, or you don’t want to deal with braiding in additional hair, using your natural hair for box braids is perfectly acceptable. First, you need to confirm that your hair is long enough to be effectively braided. Typically, your hair should be at least shoulder length when stretched to achieve a successful box braid hairstyle.
Especially with extensions, you want your hair to be long enough to effectively grip the braiding hair and prevent it from slipping. And regardless of whether you’re braiding your hair with or without extensions, you should always start on clean hair that has been thoroughly detangled and blown out.
So, you’ve decided to install box braids, and you don’t want to use extensions. Follow these steps to make the process easier:
Step 1: Sectioning
- Begin by sectioning your hair into four even sections.
- Pin up three sections and pick one to begin braiding.
- Begin by making a vertical part and pin the bulk of the unparted section.
- Then create even horizontal parts in a box formation.
- Leave one box of hair free and pin the remaining boxes.
- Now that you have one box free, separate that box into three even smaller sections of hair. This will be the base for you to begin braiding.
Step 2: Braiding
- With a firm grip, begin braiding the three smaller sections, maintaining even tension as you work down the length of your hair. However, avoid braiding too tightly, as this can contribute to hair loss.
- If your scalp feels too tight, undo the braid and start over. While you want the hair to be neat, you don’t want to create discomfort.
- Continue this process throughout your hair.
Step 3: Sealing
- Once you’ve finished braiding all of your hair, use a finishing spray such as an oil sheen on your scalp and use a light hair oil or butter to keep your braids moisturized and neat.
How to Do Box Braids with Extensions
While there are two main ways to create box braids with extensions, the easiest option for most at-home braiders is to treat your hair as the third part in the three-strand braid. Typically, you will need six to eight packs of braiding hair.
It’s always a good idea to buy extra hair just in case you might need more. The choice between synthetic and human hair is up to you. But if you want to be able to easily style your hair with hot tools, opt for human hair. While pricier, it’s designed to better withstand heat as opposed to many synthetic hair brands.
Still, some synthetic hair brands are designed for use with hot tools on lower settings. So always determine your styling goals before buying hair extensions.
Step 1: Sectioning
- Just like with box braids without extensions, begin by sectioning your hair into four equal parts. Begin creating smaller box sections.
- Section off a portion of loose braiding hair and stretch it out. This is often necessary to create the desired length once the braiding hair is folded in half. However, if you use kanekalon hair (which is usually very long), you might be able to cut the hair in half and double your available braiding hair.
Step 2: Braiding
- Hold the braiding hair from the halfway point so that you’re creating an upside-down “U.”
- Wrap the braiding hair around the base of your hair and keep it as close to the scalp as possible.
- Treat your hair as one of the three sections of a braid and begin to braid down the length of your hair. Maintain tension so that your braid is neat.
- Once you pass where your real hair ends, you will need to split the two remaining extension strands into three strands to finish the braid.
- Depending on the hair you’re using or the style you’re trying to achieve, you should decide whether you want to braid the full length of hair or leave a certain amount loose (as seen on many of the inspiration styles we featured). Whichever you decide, finish the braid by taking a small strand of the hair, wrapping it around the width of your braid, and making a small knot to keep it from unraveling.
Step 3: Sealing
- Whether you use synthetic or human hair, you need to seal your braids to keep the style intact. To do this, you’ll need to dip the ends in boiling water. However, be careful not to burn yourself when you do this! Use a towel to protect your neck, shoulders, and back as you complete this step.
Maintenance Tips: How to Wash Box Braids
Most box braids can stay in your hair for six to eight weeks with proper care. But that doesn’t mean that you should just leave them unattended for that long. If you don’t properly care for your box braids and hair during your install, you could encourage matting, extreme dirt build-up, and even hair loss when you take them out.
So how do you wash box braids?
There is a range of options here that you can use, from creating a shampoo and water mix in a squeeze bottle to using specialized scalp cleaners that are designed for people wearing braids and locks. And even among braiding experts, there’s no clear consensus on what the best practices are for washing box braids.
However, most experts agree that chlorine and saltwater exposure requires washing your box braids. If you’ve been jumping in the pool or ocean, you should most definitely plan to wash your hair. Saltwater and chlorine can create havoc for your natural hair.
While you shouldn’t opt for a traditional shampoo wash, you should, at the minimum, rinse your hair to remove any saltwater or chlorine. But it’s important to note that frequent hair washing can shorten the lifespan of this ‘do since it can lead to premature frizzing.
But even for people who aren’t jumping in pools and the ocean, they might experience itchiness on their scalp. In that case, it’s okay to opt for a gentle co-wash, where you use a conditioner to cleanse your scalp and hair as opposed to a shampoo that can strip your hair and scalp of critical natural oils.
It’s important to note that box braids need to be thoroughly dried when washed, as failing to do so can lead to mildewing. And that can lead to a nasty odor that will ruin your cute ‘do and may lead to damage to your natural hair. Also make sure to use hair oil or moisturizer regularly to keep your scalp and hair healthy during the time you have your braids on.
Still, most braiding experts agree that a scalp cleanser is your best bet, as it helps to gently cleanse and refresh your scalp without risking frizziness through the length of your braids. Scalp cleansers are often made with clarifying ingredients, such as tea tree oil, spearmint, or peppermint, and can be lightly applied directly to the scalp and then removed with a cotton pad.
How Long Should You Keep in Your Box Braids?
No matter the size or the style you opt for, it’s not recommended to keep in your box braids for longer than six to eight weeks since your hair continues growing, and keeping them in for longer can lead to hair loss and damage.
How to Remove Box Braids Safely
Once your braids begin to grow out, or you’re itching for a new ‘do, it’s time to take down box braids. So, what’s the best way to safely remove them that’s efficient but won’t cause unnecessary damage to your hair?
Don’t Rush
Just like putting them in was a process, so is removing them. Don’t rush through this process, as you can find yourself dealing with unnecessary knots or even damage from being too aggressive as you remove box braids.
Pick a day where you don’t have plans to spend with others or go out later that evening. And the smaller your box braids are, the longer it will take to remove them.
Do Embrace the Cheat
If your braids are significantly longer than your natural hair because of extensions, you have the option to cut off the excess past where your natural hair stops and then detangle from there.
This is a faster way to remove braids, but it does require that you pay attention and note where your hair ends before you start snipping unless you like looking like you’ve endured a botched haircut. If you or your braider secured each braid with a knot, this is a good guideline to use for cutting off the excess.
Start from the Bottom
Whether you cut off excess extensions or not, the logical process is to begin by unraveling the bottoms of your box braids and working your way up to the root. Depending on the size of your braids, you can use your fingers or a rat tail comb to work the braids loose.
If you’re wearing micros, you should rely on a rat tail comb to help you through this step. Unless your hair is especially tangled at the root, as you reach the beginning of the braids, they should slide out fairly easily.
Detangle as You Go
You might be tempted to take all of your braids out and then detangle your natural hair, but this is a mistake. Doing this encourages the risk that you might overlook a section of hair or rush through the detangling process. The issue with this is that when you then wash your hair, you can encourage more tangling. And that can lead to knots so intense that your only option is to cut them out.
Instead, take the time to thoroughly detangle each section of your natural hair as you remove a braid. Invest in a good detangler to help fully saturate your hair and then work from ends to root to remove shed hair and dirt. While this might feel tedious, it’s the most thorough way to tackle a box braids takedown.
Keep in mind that you’ve had your braids in for weeks. Normally the average person sheds 50 to 150 strands of hair a day. So, it’s not unusual to see a significant amount of hair shedding during the detangling process.
Indulge in a Good Deep Conditioning
While box braids are a protective style, it still leaves your hair prone to dirt build-up and damage depending on how well you cared for your hair while it was in braids. After you’ve finished removing your box braids and detangling them, invest in a good deep conditioning treatment. This will help to baby your hair and give it a little more TLC to make up for the many weeks where it wasn’t getting as much attention.
Do Box Braids Harm Your Hair?
A common question people ask about box braids is if they cause damage to your hair. The tl;dr answer is “not unless you don’t care for your hair while you wear them.”
When properly installed or cared for, box braids are a great way to protect your natural hair from excessive manipulation, extreme weather – hot or cold – and give your hair a break from constant styling. For many people, box braids and other similar protective styles give their hair a chance to grow and thrive without the risk of unnecessary damage from hot tools or incompatible products.
Still, box braids do have the potential to cause damage.
One of the biggest drawbacks of box braids – or any style that relies on braiding – is that it’s easy to make them too tight or to install too much extension hair on an individual section of your natural hair. Often braids are made tighter so that the style “lasts longer.”
However, that tension, along with repeatedly installing tight braiding styles, can lead to traction alopecia. When this happens, the actual hair follicles can be damaged and lead to hair loss.
Another common issue is that some people leave box braids in for far too long. While you want to get your money’s worth when you sit in a chair as long as 10 hours, experts agree that eight weeks is the maximum that you should keep your box braids in your hair. When you keep them longer than this, your hair grows out significantly, and matting can occur at the point where the braids and your natural hair meet.
How Much Does Getting Box Braids Cost?
This is a great question, and it depends on a range of factors. Specifically, installing your box braids will always be significantly cheaper than having them installed by a braider. When you do box braids yourself, you only need to pay for the cost of the extension hair if you use it.
However, if you decide to go to a braider, the price can vary from as little as $65 to more than $300.
So why do the prices vary so widely? The main reason has to do with time and the complexity of your braids.
Jumbo box braids take less time to install than micros. Likewise, shoulder-length box braids are a quick process, while braids that stretch down to your waist will take significantly more time. So, keep these factors in mind as you head to your favorite braiding shop.
If you want the cheapest option possible, consider the largest and shortest braid length. But if money is no object, and you want to channel your inner Beyonce or RiRi, then be prepared to spend more time in the stylist’s chair and open up your wallet.
Photos via @myesha.polnett, Instagram