- Crochet hairstyles are protective styles where hair extensions are crocheted into a person’s natural hair.
- Crocheted hair can come loose, braided or twisted, allowing endless hair styling options.
- Crochet hairstyles last from two to eight weeks with proper care, which includes cleansing the scalp, moisturizing, and co-washing.
Crochet hairstyles come in so many forms, allowing the wearer to get creative with styling while also giving a break to her natural hair. If it’s your first time trying it, we have prepared the ultimate guide to crochet hairstyles, from pros and cons to the types to go for. We’ll share the low-down on the history of crochet hairstyles, how to care for them, and how to do it yourself if you’re up for the challenge!
In this article:
- What Is a Crochet Hairstyle?
- Pros & Cons of Wearing Crochet Hairstyles
- Types of Crochet Hairstyles
- Who Is Crochet Hair Best for?
- How to Install Crochet Hairstyles?
- How to Wash and Maintain Crochet Hair?
- How to Remove Crochet Hairstyles?
- How Much Does It Cost to Get Crochet Hairstyles at the Salon?
What Is a Crochet Hairstyle?
So what is a crochet hairstyle? For people in the natural hair community, a crochet hairstyle is a great protective style that implies crocheting synthetic hair extensions into one’s natural hair. It still allows for a lot of variety in terms of actual styles you can achieve and is considered a “low-manipulation style.” This means that your actual tresses are usually not left out, so there’s less risk of damage from over-styling or heat tools.
While it’s not the only protective style in a natural girl’s repertoire, it’s a great alternative to traditional options like box braids or Senegalese twists because your hair is completely braided down flat to the scalp in cornrows, and then extensions are woven in or “crocheted.” As compared to individual twists or braids, your hair experiences less stress.
The specific origin of crochet hairstyles is debatable, but the technique – colloquially referred to as the crochet method – can be traced to the 1990s. They’re often preferable to other natural protective hairstyles such as traditional braids or twists because install time is significantly shorter and is considered relatively easier to install on your own as opposed to some of the more time-consuming protective styles.
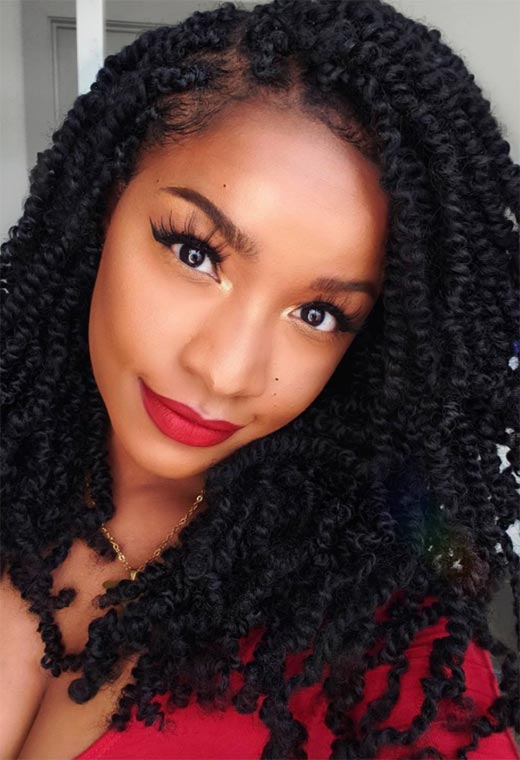
Common styles that can be achieved with a crochet hairstyle include crochet braids (also known as latch hook braids), crochet twists, crochet faux locs, or even styles where the extensions are left mainly loose to mimic the look of free-flowing tresses. Bulk synthetic hair is most commonly used for crochet hairstyles, but you can also use bulk human hair if you prefer – especially if you want to confidently use heat tools.
Pros and Cons of Wearing Crochet Hairstyles
If you’re thinking about your next hairstyle, one that relies on the crochet method should be up for consideration. But considering the time and cost investment, regardless of whether you self-install or have a stylist do it, it’s a good idea to weigh the pros and cons to make sure that a crochet hairstyle is right for you.
Crochet Hair Pros
So, let’s quickly talk about the benefits of a crochet hairstyle:
- Fairly easy to install – even for self-installers or first-timers.
- Quicker to achieve this look than traditional box braids, faux locs, or twist-outs.
- Often cheaper than other protective hairstyles.
- Lower stress placed on your natural hair because the hair is cornrowed first.
- Easier to keep your scalp clean and moisturized as compared to weaves.
- Versatile styling options, including textures, lengths, and loose versus a braided or twisted look.
- Can be refreshed easily since you simply crochet fresh extensions to replace the older hair.
Crochet Hair Cons
For all the general benefits of a crochet hairstyle, there are a few drawbacks. So, keep these realities in mind as you plan for your next hairstyle.
- Don’t last as long as other protective hairstyles – at most, you can squeeze two months out of the hairstyle.
- Washing the crocheted hair can shorten the lifespan of your crochet hairstyle.
Types of Crochet Hairstyles
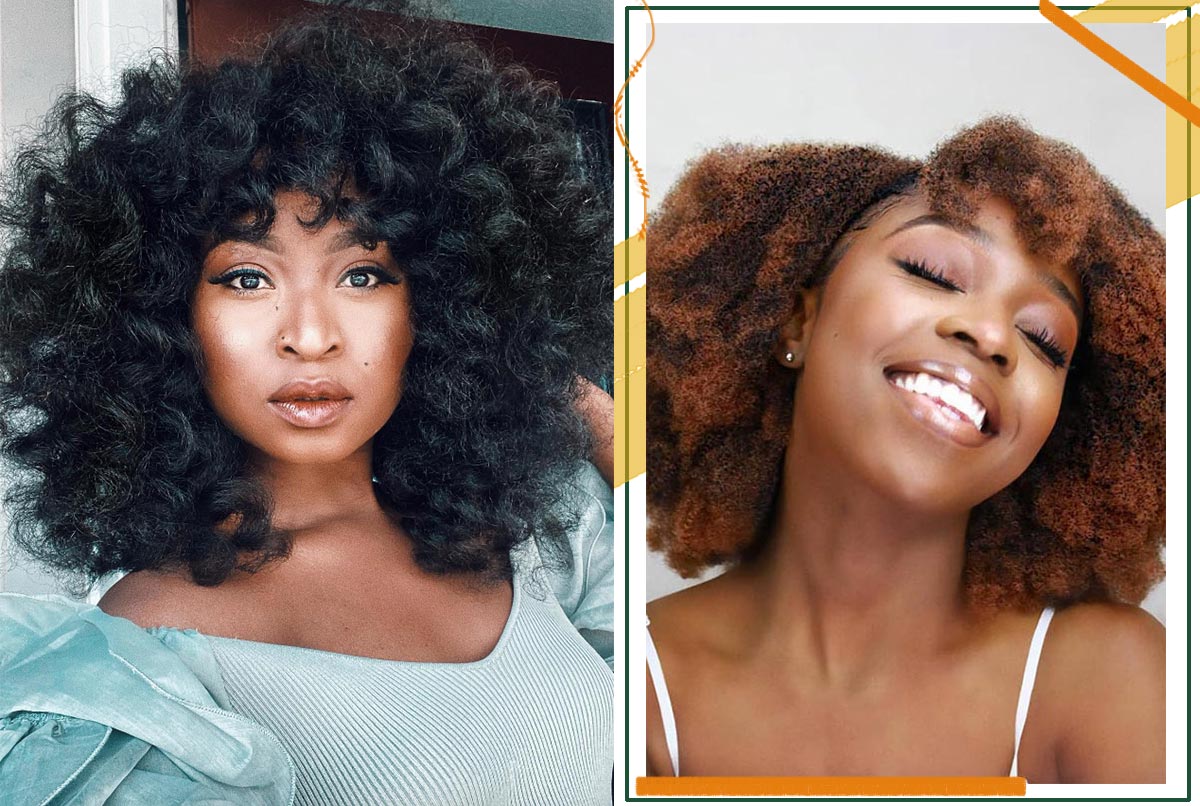
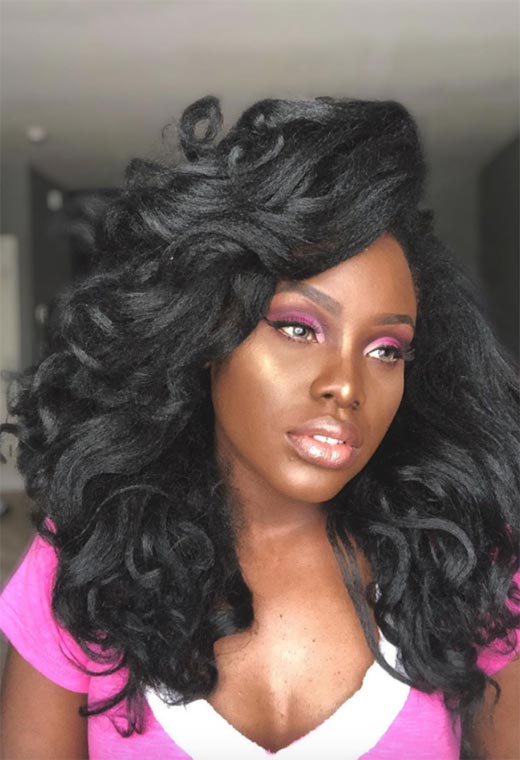
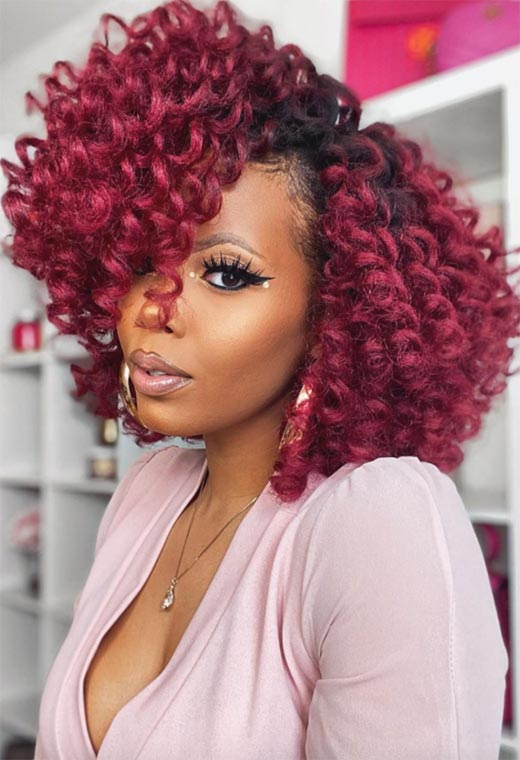
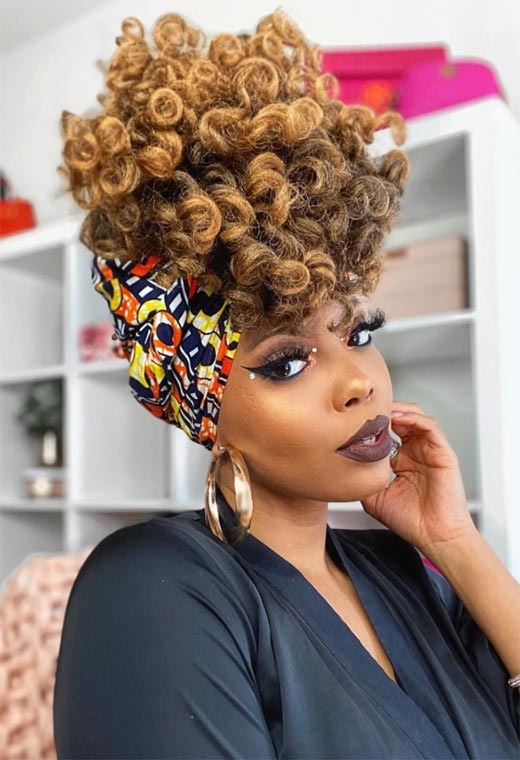
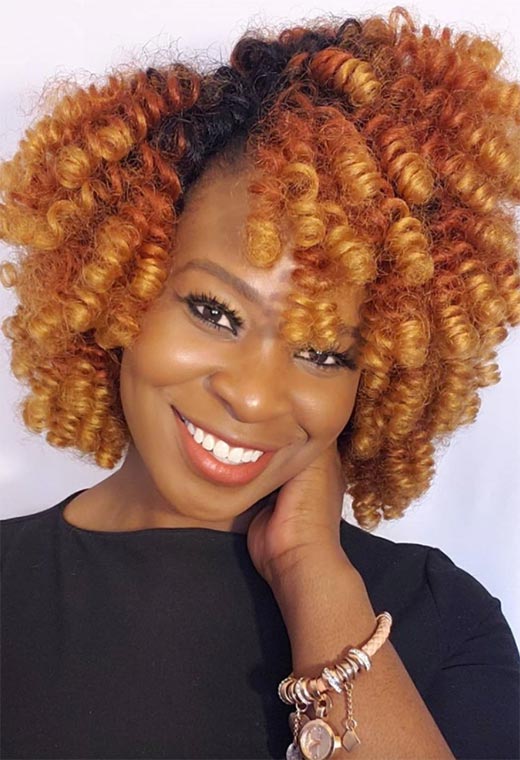
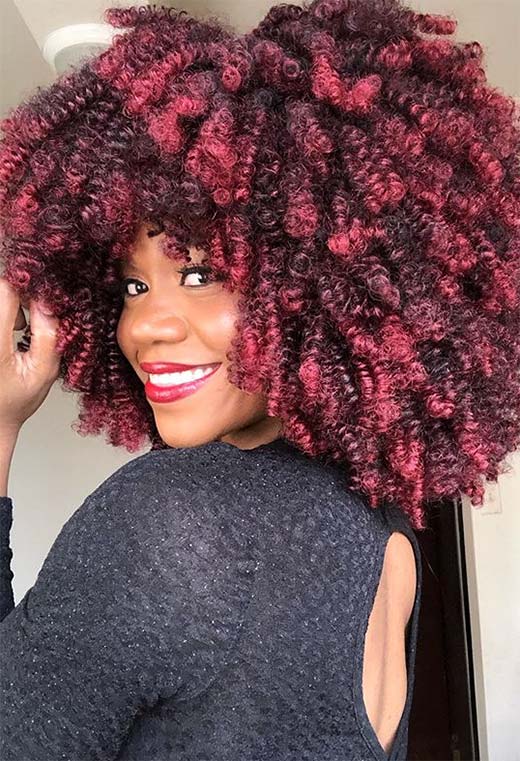
One of the biggest benefits of a crochet hairstyle is that the sky’s the limit when it comes to looks that you can achieve. As you saw with our inspo photos above, there’s a wide range of options available to you. While you can pick a more understated crochet style, this fun low-manipulation style is also a great way to play with color, texture, and length without causing unnecessary damage to your natural hair.
You can opt for crochet hairstyles that mimic traditional box braids, faux locs, or Senegalese twists without the strain on your natural hair. But you can also opt for a loose style where the extension hair is left free, and the crocheted base is undetectable.
Just make sure to discuss your style goals with your stylist so they can advise you as to the best extensions to use and how to maintain your style so that it looks great from the day it’s installed to the day you remove it.
Who Is Crochet Hair Best for?
Even though crochet hairstyles are often promoted as a protective style for people with natural hair, anyone can rock a crochet hairstyle. Even if you relax your hair, you can also enjoy this style.
The most important factor of whether or not a crochet hairstyle is a good idea for you is going to be the health of your hair. Can your hair handle being braided down for anywhere from two to eight weeks? Is your hair fragile, brittle, or breaking off? If so, then a crochet style – or any style that relies on braiding your real hair may not be ideal for you.
Likewise, if you’re someone who feels like they must wash their hair daily, then a crochet style might not be ideal, as it won’t last as long.
How to Install Crochet Hairstyles
As compared to box braids, Fulani braids, or Senegalese twists, a crocheted look is one of the few protective hairstyles that are great for first-timers to attempt to tackle. While it still requires getting the crochet technique down – and access to more than one mirror – you can relax because you don’t need to worry so much about having perfect cornrow skills.
Always Start with Clean Hair
Don’t ever start any protective style with dirty hair. This is a great way to encourage even more dirt and product build-up and create a nightmarish takedown scenario when you’re ready to take your crocheted hair out in a few weeks.
Cornrow Your Hair
While it’s great if you want to create an intricate cornrow pattern, it’s not exactly necessary. The tried and true option is one where the braids go straight back from your hairline to the nape of your neck. And again, since your hair is going to be hidden under the extensions, don’t spend time worrying about making them look perfect.
The most popular option is to make a two-into-one braiding pattern where for the front half of your hair from your hairline to the back of your ear, you opt for an even set of braids ranging from 10 to 12. The end goal is to have double the number of cornrows in the front for reduced bulk and more parting options and half the number in the back where bulk is less of a concern. But once you get just past your ears, you combine two braids. So, you should have 10 into 5 or 12 into 6 by the time you’re done.
Keep the braids in the front thinner, and if you’re going for one defined part, try to minimize the space between those specific braids so that your final hairstyle will look more natural. And while not necessary, some people prefer to weave in a bit of braiding hair into their natural hair during the cornrow process. Doing this is a good way to reduce the stress on your hair if you’re concerned about the weight of your extension hair that you’ll use for the crochet style.
Some people choose to flat-sew the ends of their braided cornrows for a flat and neat look, while others simply tuck them down. There’s no right or wrong option – pick the solution that makes you happiest.
Crocheting the Extensions
Once you’ve finished braiding your hair down, it’s time to start crocheting. There are a few ways to do this in terms of tools. You can use a crochet needle or a bobby pin. If you’re in a pinch, a large bobby pin might be the way to go – especially if you find handling crochet needles to be more difficult.
Note here though, that “crochet needle” is a bit of a misnomer. If you’ve crocheted in the sense of handcrafts, you know that the needle used for crochet hairstyles is a latch hook needle and not a true crochet needle.
- To begin, slide your needle under the cornrow with the latch closed. Assemble your extension hair by folding it in half. Open the latch on your needle and slide the looped hair into the latch and then close the latch.
- Gently pull the needle back out from under the cornrow until roughly four or five inches (when folded) of the looped hair is now pulled through under the cornrow.
- Open the latch, slide the extension hair off of the loop, and remove the needle.
- Hold the looped hair in one hand and the free end of the extensions (the tail) in your other. With your fingers, hold the loop open and put the tail through it.
- Twist the loop one time flat against the cornrow so that no excess from the tail is stuck in the twist. Then thread your tail through the loop again.
- Some people will choose to twist the loop and thread the tail three times, and some people are fine with two. Whichever you choose, once you’ve sufficiently twisted the loop and threaded the tail through, pull to tighten and eliminate any excess tail hair from the loop.
- Continue doing this throughout your head until you’re finished installing the crochet hair. Also, note that using a bobby pin will follow the same above steps.
Styling the Crocheted Hair
Styling is going to depend on the hair you picked and the final look you’re hoping to achieve. If you are opting for crochet braids or twists, then create those looks by following the proper steps. For loose crocheted looks start by trimming the hair to get rid of any scraggly strands.
Also, shape the hair if you want to have layers, bangs, or even a blunt cut. Depending on the hair and the texture you’re looking to mimic, you may need to use hot water and hair rollers to set synthetic hair or hot tools for human hair.
How to Wash and Maintain Crochet Hair?
This is the one aspect of a crochet hairstyle that can be a little tricky. The reality is that it’s a two-part answer. Not only do you want to maintain the crochet hairstyle, but you also want to take care of your real hair underneath.
Maintaining Crochet Hair
Crochet styles can last somewhere between two to eight weeks, depending on your hair care routine. With crocheted hair, your maintenance choices are going to be directly dependent on the type of hair that you used. If you used synthetic hair such as Marley twists or Kanekalon, then you can’t hop in the shower and wash them as you would your hair or human hair extensions.
First, this type of synthetic hair isn’t designed to frequently come into contact with water. And doing so can cause the curls or texture to drop, which can leave your crochet hairstyle looking a little sad. And at worse, you can loosen the knots, causing the style to fall apart over time.
Most crochet stylists will agree that you should avoid washing your extensions entirely and focus your efforts on cleansing your scalp instead. But if you do opt to wash the crochet hair, do a gentle co-wash and handle the hair carefully. Vigorous rubbing can loosen the knots and shorten the lifespan of your style.
For human hair, you should still use care when washing your extensions, but you don’t have to be as concerned about getting the hair wet. Still, avoid vigorously rubbing your extensions to preserve your hairstyle.
Caring for Your Hair
The whole point of a protective style is to give your real hair a break without the risk of constant manipulation that wearing it out can pose. But that doesn’t mean that you should leave your natural hair untouched until you take down the protective style. If your goal is to promote hair growth and health, then you still need to cleanse your scalp and moisturize your hair.
If you’re also focused on preserving the hairstyle, opt for a targeted scalp cleanse that relies on the squeeze bottle method. While it might take a bit more time, the goal here is to use a bottle mixed with shampoo and water to apply directly to your scalp.
- With the pads of your fingers, gently work the solution into your scalp and your cornrows – try as much as possible to avoid over-saturating the extensions.
- Rinse out the shampoo mix but also be sure to rinse out any mix that might have saturated your extensions.
- For a short cut, choose a leave-in conditioner instead of one that must be rinsed out of your hair. And if you choose, spritz your extensions with the leave-in as well.
The most important thing to remember when washing your hair when it’s in a crochet style is that you want to be sure that your hair dries thoroughly. While it’s not common, it’s possible to experience mildew if the hair is left wet and unable to thoroughly dry. When in doubt, use a blow dryer on a medium or low setting to specifically focus on your cornrows.
How to Remove Crochet Hairstyles
Removing a crochet hairstyle is just as easy as if you were taking down braids or twists – if not easier!
- Start by cutting each crocheted extension as close to the original knots as possible. But be sure not to catch your hair in the process.
- Although it’s an optional choice, some people prefer to add an oil like coconut or jojoba to their cornrows once they’ve trimmed off all of the extensions and let it sit for 30 minutes. Doing this will give you more slip and make taking down the cornrows easier.
- After 30 minutes, begin to unravel your cornrows. The remaining crocheted hair should easily slip out as you work through the braids.
How Much Does It Cost to Get Crochet Hairstyles at the Salon?
This is a common question that people ask, and the tl;dr answer is that it depends. While installing a crochet hairstyle yourself is incredibly cheap since you only have to pay for the hair, a salon install can vary based on where you live, the salon you pick, and the complexity of the style you’re trying to create.
Factors such as the length you’re trying to achieve, or the size of your braids or twists (if you opt for that style) can come into play. However, plan to spend around $100 with the understanding that some salons will charge more because of the time commitment required to do this style.
Photos via @sincerelycay, @kuchh.j, Instagram

