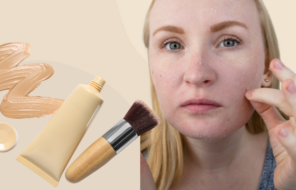
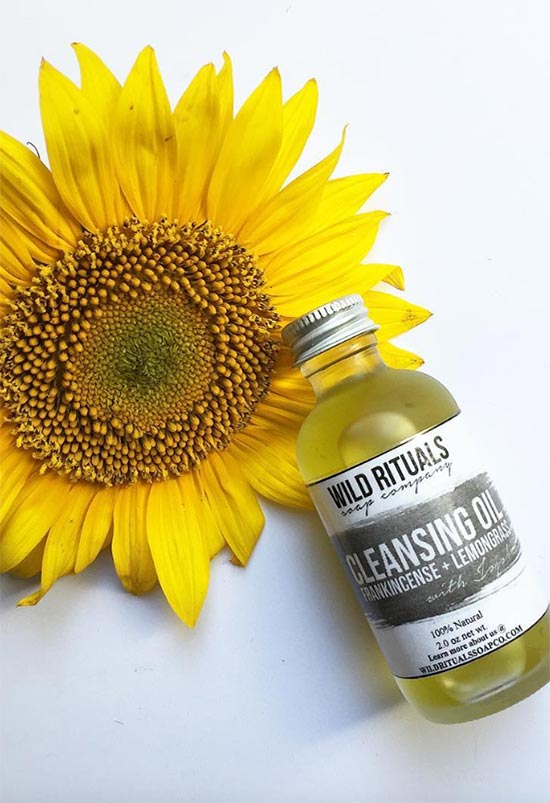
The Oil Cleansing Method, which is also often referred to as OCM, has now been around for long enough that I hope you’ve heard of it. After making a splash on the skin care scene nearly a decade ago (does that make anyone else feel old?), the oil cleansing method has become a mainstay in many people’s daily care routines.
No matter your skin type, don’t let the word oil scare you! Oil cleansing is as diverse as the amount of skin oils out on the market. There are a few techniques you can utilize, so with a bit of research I assure you that you can make the oil cleansing method work for you.
All the information is right here in this post, as I’ll go in depth into what oil cleansing is, exactly how it works, and what the best methods of doing it are. I’ll break the oil cleansing method down by skin type and oil types, so you can easily choose the right blend for you. I’ll also give all the important pros, cons, dos, and don’ts so you really get the full picture.
In this article:
- What Is Oil Cleansing?
- How Does the Oil Cleansing Method Work?
- The Oil Cleansing Method vs. Traditional Cleansers
- The Oil Cleansing Method by Skin Type
- Oil Cleansing Dos & Don’ts
- How to Oil Cleanse: The Different Oil Cleansing Methods
- Pros & Cons of Oil Cleansing
- The Best Oils for DIY Oil Cleansing
- How to Make a Rinse-off Oil Cleanser
What Is Oil Cleansing?
In the simplest way possible, oil cleansing is cleansing the skin with oil. To many that might sound counterintuitive, but in reality oil actually does a fabulous job of clearing the skin of dirt, sweat, makeup, impurities, and even excess oil (also called sebum).
You can choose any oil for the oil cleansing method, and later in this article I’ll even help you choose the best oils for oil cleansing your skin. To oil cleanse one simply rubs the oil (or blend of oils) on their skin, and then removes it either with a damp microfiber cloth, cotton pads, or, in the case of oil cleansers with emulsifiers, with water.
There are a few different techniques of doing oil cleansing, and the one each person chooses should depend on the kind of ingredients they want to use, and which technique appeals to them the most.
How Does the Oil Cleansing Method Work?
Do you remember the phrase “like attracts like” from your high school chemistry class? Well, that’s the principle at play when it comes to oil cleansing.
Oils are lipophilic, which means that they are attracted to other oils, including the oils on our face. They’re also solvents, which means they are very good at breaking those oils down.
When you apply oil to your skin and give it a few seconds to work by massaging it in, it very quickly dissolves all the things that you want to be gone from your skin.
The Oil Cleansing Method vs. Traditional Cleansers
Not all facial cleansers are created equal. Especially when you look at cheaper cleansers, they tend to be made up mostly of detergents.
While across the board these detergents tend to do a good job of cleansing the skin, they are also very likely to strip it completely of oil, dehydrate it, and irritate it. This is especially true with sodium lauryl and sodium laureth sulfates, which are two of the most ubiquitous cleansing agents out on the market.
Even gentler cleansing ingredients like cocamidopropyl betaine are still harsher on dry skin than oil is. The oil cleansing method doesn’t have any of these skin stripping properties (although some oils might irritate some skin types), so it is phenomenal for people whose skin has been damaged by harsh cleansers or other irritants.
Unlike commercial cleansers, however, the oil cleansing method does normally leave behind some oil residue. This isn’t usually an issue for people with dry or normal skin, but for those with oily skin it can lead to a greasy look throughout the day. In that case it’s better to use an oil cleanser with some emulsifiers in it (you can even make your own – I give instructions below) to double cleanse or to find a gentle cleanser without harsh detergents.
The Oil Cleansing Method by Skin Type
Like anything in skin care, the oil cleansing method should also be adapted to your skin type and concerns for you to get the most out of it. So here is how oil cleansing works for each skin type:
Oil Cleansing Method for Dry Skin
Those with dry skin tend to have smaller pores, and their skin simply does not produce a lot of oil. Their skin tends to feel drier and more delicate to the touch, especially if they don’t have a great moisturizing routine.
For those with dry skin, the oil cleansing method usually works beautifully! To get the most benefits out of the oil cleansing method for dry skin you should take the chance to mix a few oils together to get a variety of additional benefits, since each oil has its own unique compounds.
Jojoba oil, apricot oil, and almond oil are great base oils for dry skin, since they have a wonderful texture, while adding a few drops of rosehip seed oil can give anti-aging benefits.
Dry skin is often dehydrated in addition to lacking oil, so if that’s the case for you, avoid overly occlusive oils like mineral oil, as they will prevent hydrating serums from penetrating your skin after the cleansing.
Oil Cleansing Method for Oily Skin
Those with oily skin usually have larger pores, and their skin produces quite a bit of oil throughout the day. Those with oily skin don’t usually do well with the traditional oil cleansing routine. This is because in the traditional oil cleansing routine no oils are removed from the skin.
This isn’t to say that oil cleansing doesn’t work at all for those with oil skin – it’s actually a great choice, especially if you’re a fan of heavy makeup. There are two ways in which oil cleansing works well for oily skin types.
The first one is as part of a double cleansing. First, remove heavier debris like sunscreen and makeup, cleanse your skin with your oil or oil blend (best oils for oily skin are hemp oil, grape seed oil, cold-pressed sunflower oil, or safflower oil, and just a touch of castor oil).
After that do a second cleansing with a gentle cleanser to remove the oil residue from the cleansing. To avoid double cleansing you can experiment with your oil blend and perhaps find an oil mix that doesn’t leave a greasy residue behind.
The other option is to use an oil cleanser that contains an emulsifier, so it can be rinsed off with water. You can purchase one, like the DHC Deep Cleansing Oil from Dermstore, or you can make your own following the recipe I shared below.
Oil Cleansing Method for Normal Skin
If you have medium sized pores and your skin only produces a small amount of oil throughout the day, then congratulations, you have the much coveted normal skin type! You could follow any method of oil cleansing, including the most minimalist, and your skin will thrive and feel healthy.
Normal skin types that are not acne prone can use any oil, although if you do occasionally break out, sunflower or safflower oils are likely the best choices.
Oil Cleansing Method for Combination Skin
Those with combination skin usually have larger pores in the T-zone and small or medium sized pores over the rest of their face. The amount of oil their skin produces fluctuates with the seasons.
If this sounds like you, then you really need to judge for yourself if you prefer a more traditional OCM that would leave a bit of oil on the skin, or the rinse-off or double cleansing method.
The best oil blend for combination skin would be light but nourishing, so a hint of jojoba oil along with lighter oils like grape seed or rosehip oil would be a great choice.
Oil Cleansing Method for Mature Skin
Those who are concerned about premature aging or whose skin is starting to show fine lines and wrinkles can greatly benefit from all of the skin-restoring and protecting properties that botanical oils have.
Usually those with mature skin are on the drier side of things, so an oil rich in oleic acid like almond oil can work well as a nourishing base, while oils rich in antioxidants like rosehip seed oil or sunflower oil will help prevent signs of premature aging. A few drops of sandalwood or rose essential oils will boost the antioxidant properties of your oils.
The massage from the oil cleansing method does a beautiful job of stimulating the skin and firming it up. Some anti-aging serums don’t penetrate the skin through oil, so either use those kinds of serums in the morning when you don’t oil cleanse, or do a double cleansing before applying them to the skin.
Oil Cleansing Method for Acne-Prone Skin
The greatest question of all is whether the oil cleansing method and acne go well together. My answer is a resounding yes!
Acne tends to be exacerbated by harsh cleansers that irritate the skin and throw its pH off balance. This is not an issue with oil cleansing – in fact, the oil cleansing method can repair all the damage caused by the harsh skin care routines people with acne often go for.
Contrary to popular belief, not all oils cause acne. Many oils are considered not only safe for acne-prone skin, but they’re actually very beneficial! These include hemp seed oil, which has the ability to minimize acne inflammation, rosehip seed oil, which has skin-renewing properties that help prevent new acne breakouts from forming.
Grape seed oil, sunflower oil, and safflower oil are also great choices for acne-prone skin. For extra antibacterial properties you can add a few drops of tea tree essential oil to your blend.
It’s important to be very gentle when massaging broken-out areas, as to not pop any pimples and spread bacteria around. By the way, if you search reddit for testimonials on the oil cleansing method, you will find a lot of people with cystic acne who have had wonderful results!
Oil Cleansing Method for Sensitive Skin
Those with sensitive skin tend to have negative reactions to skin care very quickly. Their skin becomes red at the drop of a hat, and it can also get painful, raw, inflamed, or irritated.
Those with sensitive skin should keep things simple, which is why the oil cleansing method is a great choice. Since oil cleansing cleans and moisturizes all at once, it can be the only step in your skin care routine.
The best oils for sensitive skin are the ones with anti-inflammatory properties, like hemp seed oil and coconut oil, as well as simple non-irritating oils like jojoba oil. When you have sensitive skin it is very important to patch test the oil for a few days before applying it to your face. Avoid adding essential oils to your oil blend, as those can aggravate the skin as well.
Oil Cleansing Dos & Don’ts
- Do choose an oil based on your skin type, and don’t fall for the idea that there is a “one size fits all” magical oil. An oil that might work well for one skin type will not help another person’s skin.
- Do patch test your oil as you would any other skin care product, by applying it to your inner arm or forearm a few days in a row. Oils, like anything else, can cause allergies in some, so it’s better to find that out earlier rather than when it’s too late and you’ve slathered oil all over your face.
- Do cleanse your skin in the evening. We don’t need such a deep cleanse in the mornings. This is also a great solution if you want to use actives like glycolic acid or vitamin C – use them in the morning when you don’t oil cleanse.
- Don’t use a hot washcloth to remove the oils from your skin, and certainly don’t let it sit on your skin for more than a few seconds. While this is advice that is frequently given in various oil cleansing guides because the heat will help remove the oil more quickly, it can be quite harmful to the skin. A washcloth that is just a little warm will do a fine job without harming the skin.
- Don’t rely on oil cleansing as your only cleanser if you use skin care products that don’t penetrate the skin through oil. This is especially relevant for glycolic acid and vitamin C (particularly in the form of ascorbic acid), which are both great skin care ingredients that are not oil soluble.
- Don’t expect miracle results instantly. As with any skin care changes, the oil cleansing method takes some time before its benefits to the skin are apparent. Be patient!

How to Oil Cleanse: The Different Oil Cleansing Methods
Just like selecting the best oils for your skin type, you should also be prudent to go for the right oil cleansing method to get maximum results quickly.
Traditional Oil Cleansing Method
The traditional oil cleansing method is best suited for skin care minimalists, and those with dry or normal skin. It also works for people with highly reactive skin who don’t do well with a skin care routine with too many products or too many actives. It’s better to avoid overly occlusive oils, especially if you intend to use more skin care products after oil cleansing.
- Choose an oil or oil blend based on the list below. The original OCM sources recommended a mix of base oil and a small percentage of castor oil, but with so many oils out there and so many different textures I actually recommend experimenting, especially since castor oil doesn’t work for everyone.
- Starting with dry skin (trust me, this method just doesn’t work well when water is added to the mix), massage a nickel-sized amount of oil into your skin. Rub it into your skin in upward circular motions until all makeup, sunscreen, and other debris have dissolved.
- If you were wearing makeup or sunscreen, you should remove the first layer of oil with a damp washcloth, microfiber cloth, or muslin that has been soaked with warm (not hot!) water. If you weren’t, save this step for later and move straight on to the next one.
- If necessary, apply a bit more oil, and massage the skin concentrating on areas where you have congestion in the skin – either hard plugs of sebum in the pore or even blackheads. Do not massage for long than 60 seconds, and don’t be too aggressive. You may notice those hard plugs of sebum and dead skin coming out of the pores, and your skin will feel much clearer.
- Now you’re ready to fully remove everything. Microfiber cloths and muslins are usually the softest and gentlest option – just make sure you’re using a fresh, clean cloth each time. Get it wet with warm water, and begin removing the oil. You may find that pressing it into the skin for a few seconds and then wiping works best. You can also use a face wipe or paper towel instead.
- That’s it! Your skin is clean now. At this point you can finish off your skin care routine with a swipe of toner, spot treatments, serums, and moisturizers. Some people find that all they need for skin moisturizing is the oil cleansing, so you can also stop here, or add a few more drops of oil to your skin.
Double Cleansing with Oil
Double cleansing is a great choice for people who need thorough makeup removal or an extra step to fortify their skin before using a detergent-based cleanser. It’s also a great choice if you have oily skin but are still interested in the benefits of oil cleansing without the actual residue of oil on the skin.
Lastly, this method is ideal for people who use skin care with active ingredients that don’t penetrate through oil, like glycolic acid or vitamin C.
- Begin the process as outlined in the previous section, by massaging a nickel-sized amount into your skin in circular upward motions. Watch in wonder as your makeup dissolves easily.
- Remove the oil with a damp cloth, or a disposable wipe.
- Splash some water on your face and do a second cleansing with a gentle, detergent-based cleanser that has a low pH. Massage the cleanser into your skin in circular motions.
- Rinse the cleanser away with water or use the damp cloth again to remove it.
- Finish off with the rest of your skin care routine, knowing that since your skin has been so thoroughly cleansed, everything will penetrate in beautifully.
Using a Rinse-Off Oil Cleanser
Rinse-off oil cleansers are a great option if you’re not quite ready for the involved process of massaging and wiping straight oil. They act a lot more like traditional cleansers, since they can be rinsed away with water.
They can work for single cleansing or double cleansing, and they’re great for all skin types including oily skin. You can purchase an oil cleanser like this, or you can make your own following the recipe I list below.
- Massage a nickel-sized amount of oil cleanser to dry skin.
- Once all of the dirt, sweat, oil, and makeup on your skin have fully dissolved, add a few drops of water to your skin and continue massaging. Your cleanser will emulsify and become milky white.
- Now you can rinse away the cleanser, either just with water or with a damp washcloth.
- You can now use a second cleanser, or finish off your skin care routine with a toner, serums, and moisturizers.
Pros & Cons of Oil Cleansing
The thing with the oil cleansing method is that it doesn’t exactly have pros and cons – it just is what it is, and either it’ll fit your lifestyle or it won’t. This list will help you figure out if it’s exactly what you need in your life, or if it’s more trouble than it’s worth.
Pros:
- The oil cleansing method cleanses very effectively.
- It is the fastest way of removing makeup and sunscreen.
- It’s great for all skin types.
- Doesn’t dehydrate the skin.
- Helps heal damaged skin.
- Botanical oils used for oil cleansing have a lot of other beneficial properties for the skin.
- The oil cleansing method is great for minimalist skin care routines.
- Oil cleansing can be extremely cheap.
- It’s great for people with a lot of sensitivities since there are so few ingredients.
Cons:
- Can be messier than traditional cleansers.
- There can be a lot of trial and error to find the right oil for you.
- Doesn’t always fit in comfortably with a more traditional skin care routine.
- Doesn’t play nicely with vitamin C and glycolic acid.
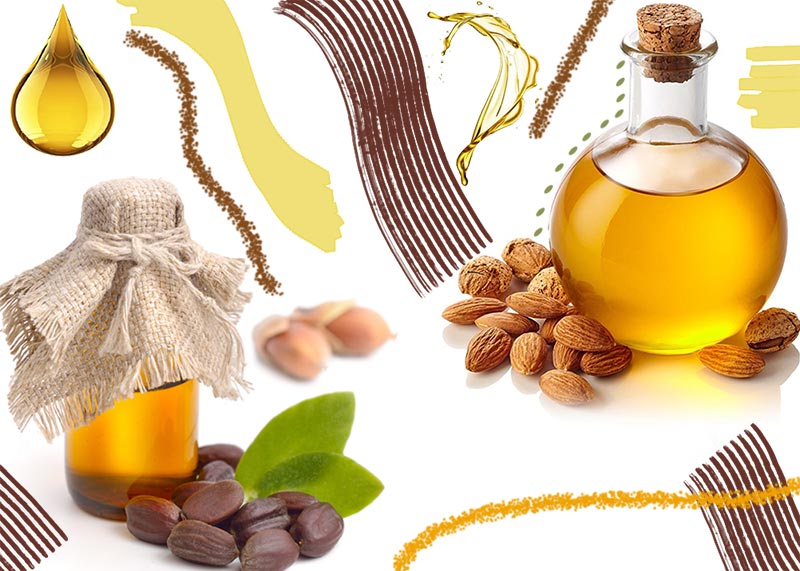
The Best Oils for DIY Oil Cleansing
There are so many oils on the market these days, and I just couldn’t list all of them. These are just my favorite oils for the oil cleansing method, and I explain exactly which skin type and concerns each one works for, along with some details about their feel and texture.
If you find yourself curious about an oil not listed here and want to see if it’s right for you, look at its fatty acid profile. Oils high in oleic acid are usually better for those with dry skin and should be avoided by those dealing with acne, while oils high in linoleic, alpha-linolenic, or gamma-linolenic acid are great for acne-prone skin.

Mineral Oil
Mineral oil is my go-to cleansing oil in a pinch for a few reasons. First of all, it is considered non-comedogenic, so it is extremely unlikely to break anyone out, and is great for oil cleansing acne-prone skin.
Second, it is a very gentle and simple oil, so it is unlikely to cause any irritation to the skin. Lastly, it is really darn cheap and you can find it just about anywhere.
Mineral oil is very occlusive, which means that it creates a seal over the skin. If you’re looking for a one-and-done kind of oil, and don’t feel the need to use humectant, mineral oil is very maligned amongst certain people because historically it used to contain some contaminants.
Nowadays the mineral oil and baby oil sold in the store are perfectly safe to use. Some people prefer to avoid byproducts of the petroleum industry, which is a fair reason to avoid it.
Castor Oil
Castor oil is a thick yet astringent oil with some humectant properties. This means that it leaves the skin feeling a little dry and tight, but it is also able to pull water into the skin from the air. Sounds contradictory, doesn’t it?
However, this is the truth! Castor oil is not recommended to use alone, but it can be added to greasier feeling oil to reduce some of that greasiness, and to give some of its unique benefits.
Sunflower Oil
Cold-pressed sunflower oil is a great choice for just about anyone, but its particularly safe for those with acne-prone skin. This oil has a nourishing texture, and it’s loaded with soothing vitamin E. It also does not cause any breakouts, so it really allows acne to heal safely and gently, without loading the skin up with acne-causing compounds.
Jojoba Oil
Jojoba oil is a great choice for those with dry skin. This oil is technically a wax, since it is made of esters instead of fatty acids, which makes it very similar to human oil (i.e. sebum).
It has a light texture but it is extremely emollient and nourishing, and it contains a ton of antioxidants. It doesn’t seal the skin the way other oils might, so you won’t have any issues layering lighter serums over the skin after applying it.
Those with acne-prone skin are better off avoiding jojoba oil, since, contrary to popular belief, it can still cause breakouts. You can use it alone, or blend it with other oils to get a different texture or to enjoy other benefits.
Grape Seed Oil
Grape seed oil is also a great oil for acne-prone skin, and it has a super light texture that makes it work especially well for oily skin. It’s an inexpensive oil, but it does have a very short shelf life so it’s better to keep it in the mini fridge or to add vitamin E to it. Because its texture is so light you might want to blend it with a heavier oil for better skin cleansing – especially if you wear heavy makeup.
Hemp Seed Oil
Hemp seed oil is becoming extremely popular for oil cleansing acne-prone skin, because in addition to being light and dry and having a non-comedogenic profile, it also contains a significant percentage of gamma linolenic acid, an anti-inflammatory fatty acid that helps rapidly reduce active acne. It has a short shelf life, so pay attention to the best-by date on the bottle and keep it in the fridge.
Apricot Kernel Oil
Apricot kernel oil is an oil better suited to those with dry skin that is not prone to acne. It is inexpensive, and contains some lovely skin-nourishing and anti-aging compounds. It contains oleic acid, a fatty acid that can help reduce redness and inflammation.
Sweet Almond Oil
Sweet almond oil is similar in profile to apricot oil, so it is similarly better suited to those who don’t tend to suffer from acne. It has a beautiful light texture, and it does a great job removing makeup.
Coconut Oil
Coconut oil is one of the best oils for dry, sensitive skin. It is rich in anti-inflammatory lauric acid, which helps to reduce redness and irritation. It has a thick, creamy texture, and is extremely moisturizing.
The less refined, the stronger its delicious coconutty smell. Coconut oil can cause breakouts, so those with acne-prone skin should patch test it first if they’re interested in using it.
Rosehip Seed Oil
Rosehip seed oil is a great choice for just about anyone, but especially for those dealing with special concerns like acne, scarring, or hyperpigmentation. It is a non-comedogenic oil with two forms of vitamin A, so it helps to renew the skin and improves any of its texture issues. Since it’s an expensive oil, you can choose to blend it with a cheaper oil.
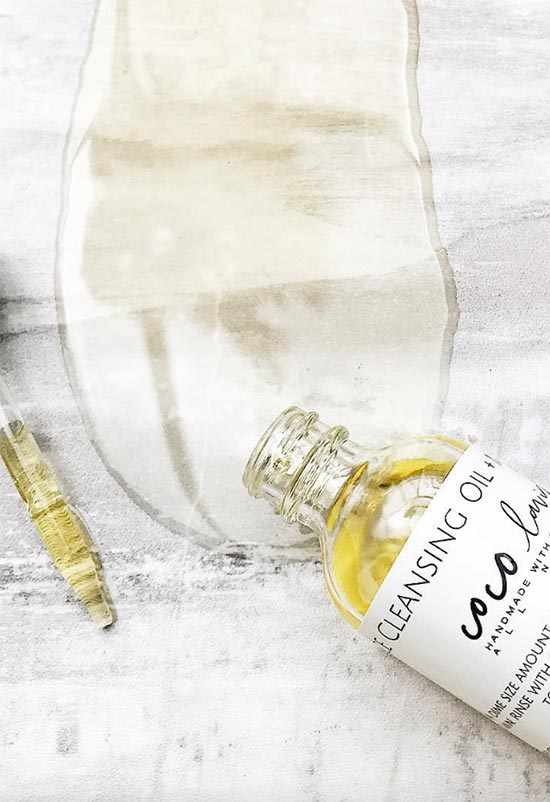
How to Make a Rinse-off Oil Cleanser
If you want to experiment with cosmetics formulations, this is actually one of the best beginner recipes! It’s simple and safe, and it teaches you some very important skin care formulation principles – how emulsifiers work.
Emulsifiers are skin care ingredients that allow oil and water to mix together by lowering the surface tension of the liquids. This is important for moisturizers, since moisturizers contain both oil and water, but it’s also key for creating an oil cleanser that will be removed with water.
Normally oil and water repel each other, but once you add emulsifier to the oil it will easily blend with the water instead of repelling it off of the skin. This is a great creation for those who have an oilier skin type and don’t want too much residue on their skin from the oil cleansing method.
To create your own rinse-off oil cleanser you will need:
- Your oil or oils of choice
- An emulsifier (popular choices include: Cromollient SCE, Polysorbate-80, and Polysorbate-20, which can all be purchased from online distributors of wholesale cosmetic ingredients)
- A clean bottle that will keep out water completely, preferably with a pump
- Optional: vitamin E, essential oils
Pour your oil or oil blend into your clean bottle. The oil should be about 90% of the formula. Fill up the rest of the bottle with 10% of your emulsifier of choice. If you like, add a few drops of a skin-safe essential oil of your choice. Give the whole thing a healthy shake, and you’re done!
Notes: your DIY oil cleanser will have the same shelf life as the ingredient with the shortest shelf life, which will usually be a light, non-comedogenic oil like grape seed, hemp, or rosehip oil. Adding 1%-2% vitamin E to the formula can increase the longevity of your oil cleanser.
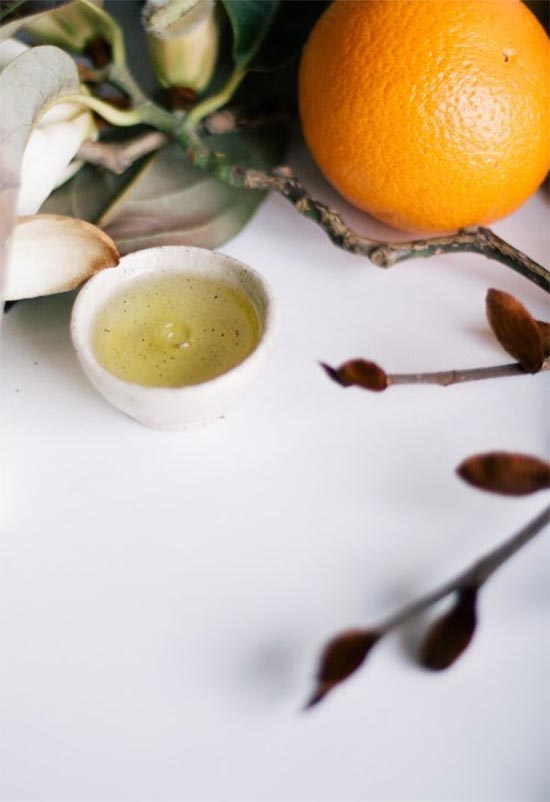
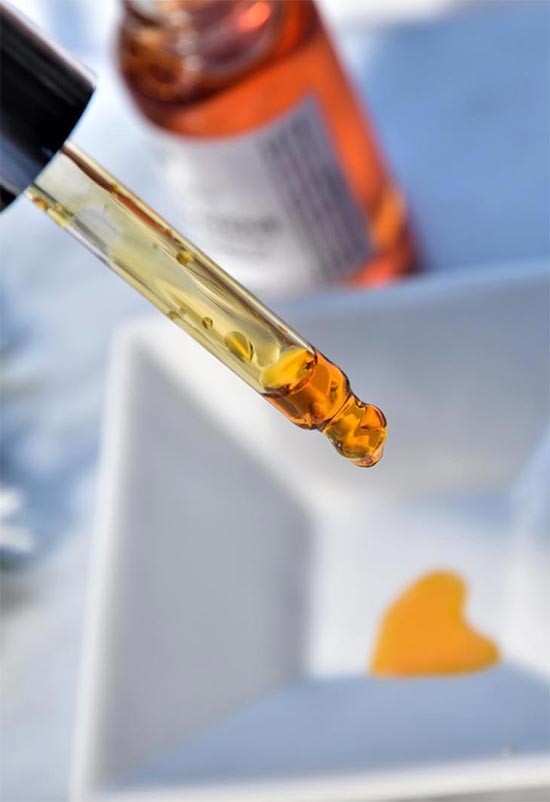
Photos via Instagram