Dark skin makeup tips and tricks vary wildly and can be based mostly on preference. Here are a few that will work no matter who you are and won’t affect any personal preferences that you shouldn’t drop like a bad habit anyway.
There are a lot of options to apply makeup now, from the standard brushes to fingertips, standard sponges, silisponges and, of course, the beauty blender. There is also, of course, the airbrush method for those who really want to use it, but which is the best option for applying foundation for dark skin?
Application methods depend on more than preference; it depends on the type of foundation you are using. You cannot very well use a powder for airbrushing as an example, so what is the best way to get flawless foundation applied?

Applying Foundation for Dark Skin Tones with Traditional Brushes
Traditional makeup brushes come in a wide range of shapes, but the quick and easy way to designate a brush for a purpose is to remember this: the heavier and denser the foundation, the denser the bristles of the brush you use to apply it should be.
For a loose powder foundation, a fluffy brush is best. For liquids, a densely packed brush is best. Creams use a densely packed brush as well, and on it goes!
Don’t forgo the use of blending brushes or specialty brushes in your kit, but remember the type of foundation you primarily wear, and make certain that those are the brushes you keep in good stock and condition. Brushes provide great precision as well.
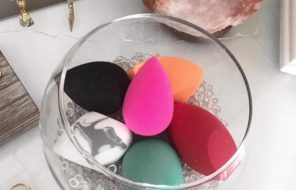
Applying Foundation for Dark Skin Tones with Makeup Sponges and Beauty Blender
Makeup sponges offer some of the biggest catch-22s of the makeup world. They are great for creating a smooth seamless, flawless look, but they are notorious for soaking up and essentially wasting a lot of product.
When you are using an expensive foundation, that is just not ideal. The use of brushes and a beauty blender for application, precision and a great finish with blurred seamless edges is the best combo for most people.
Applying Foundation for Dark Skin Tones with Silisponge and Other Silicone Sponges
These are great, but take some getting used to. The application can be flawless, but most of us are used to a brush or a sponge.
Practice makes perfect with these and they are great with anything smooth and creamy, liquids, mousse and cream foundations alike. Unlike brushes and sponges, these do not soak up or waste any foundation at all.
Applying Stick Foundation for Dark Skin Tones
Stick foundations can be applied with densely packed paddle-shaped brushes if not put straight onto the skin. It depends on your preference, but as you use it your skill with applying your foundation via stick will grow, and your look will be polished, flattering and natural either way.
Makeup Tips and Tricks for Dark Skin Tones
- Do your eye makeup first! There are a lot of arguments for doing your foundation first, but for those with darker skin tones, and really anyone if we’re honest, you don’t want to muddy up your foundation especially around your eyes. So, it is worth considering doing your eye makeup and arching out your brow first. You can easily clear up any excess or spills without worrying about the finish of your foundation being affected.
- Baking and Setting Powders: People with darker skin tones can be worried about baking giving them an ashen appearance. Don’t worry! Just don’t use a setting powder that only comes in white.
- Just like your foundation, look for a setting powder that more carefully matches your skin tone to avoid that white mask around your eyes. These are not one-shade-fits-all, so please remember there are other options besides banana powder as well.
- Don’t apply your makeup with your fingers if you have oily skin! Oily skin is more prone to breakouts and our hands are one of the easiest ways to transfer gems to our skin, even when we’re trying to be careful. Use a brush or a sponge and make certain your tools are cleaned regularly and stored well.
- Touchups: Use blotting papers before touching up your makeup. This will refresh your look and keep you from putting too much product on and risking a cakey appearance or breakouts.
- Pampering and Exfoliating: Exfoliating should not be done more than once a week to refresh skin. Deep cleaning with a gentle scrub or exfoliating brush should be done about three times a week.
- Moisturizing is essential and should be done regularly, no matter what your skin type is. To get it on smoothly and evenly, use a damp beauty blender to apply your moisturizer, and always use a moisturizer before your foundation. There are even plenty of hydrating makeup primers if you want to combine the two steps.
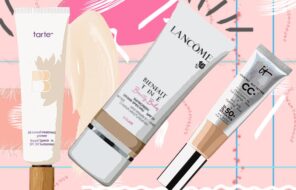
- SPF! No matter what color your skin is, you need to protect it from the sun. If your makeup doesn’t have an SPF in it, you need to apply it separately. Fortunately, there are plenty of foundation options that include an SPF in it.
- Clean your tools often to prevent breakouts. There are hundreds of videos available to teach you the best, quickest and most hygienic way to clean your makeup brushes, sponges and cases to make certain you are limiting the amount of bacteria transferred to your face.
- Color Correction: Don’t be afraid to use color correctors even though they can be intimidating. Yellow cancels out purple and blue tones and can correct mild redness. Purple neutralizes dull yellow undertones on medium-toned skin. Orange is the best choice to cancel out dark under-eye circles, blue, discoloration and hyperpigmentation on deep and medium-toned skin. Red cancels out green, dark under-eye circles and is best for covering up hollow or sunken under-eye skin and even tattoos.
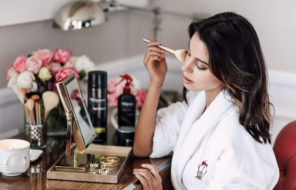
Photos via @makeupshayla, Instagram