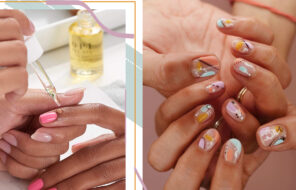
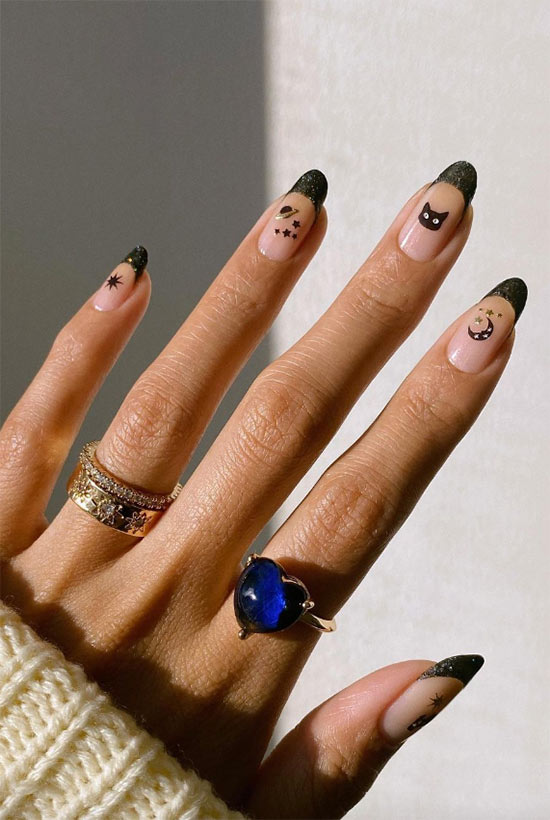
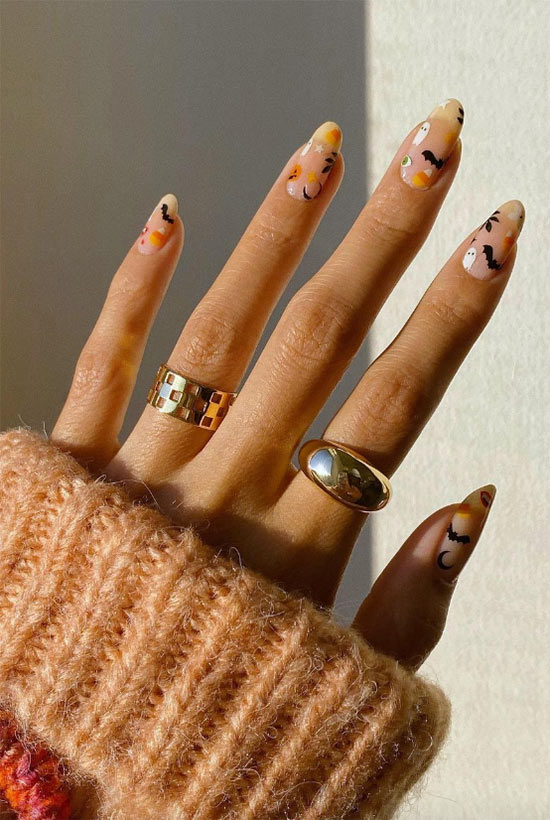
- Nail stickers or tattoos are ready-made nail art appliqués – usually in a small dimension – that enhance your regular manicure.
- There are self-adhesive and water-transferable nail stickers in different patterns and designs.
- When used with a quality top coat, nail tattoos can last somewhere up to two weeks without harming nail beds.
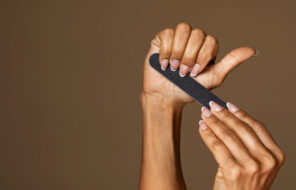
One of my favorite self-care activities is indulging in a good manicure/pedicure. While I’m a massive fan of the real deal mani/ pedi, I can’t argue with how much you can save by learning to do these things at home.
Learning the techniques can be time-consuming, but there are so many options for DIY manicures/pedicures. As you perfect your at-home manicure, you can add creativity and individuality by adding nail stickers, also known as nail tattoos or nail decals. In this article, we’ll show you the difference between nail stickers, wraps, and stamps. To learn more about nail stickers and how to apply them, keep reading!
In this article:
- What Are Nail Stickers and How Do They Work?
- Nail Stickers vs. Nail Stamps vs. Nail Polish Strips
- Pros & Cons of Nail Tattoo Stickers
- Do Nail Stickers Damage Nails?
- Should You Apply a Top Coat over Nail Stickers?
- How Long Do Nail Tattoo Stickers Last?
- How to Apply Nail Stickers Correctly?
- How to Remove Nail Stickers Safely?
What Are Nail Stickers and How Do They Work?
While you probably remember nail stickers as the less fun nail art for kids, they have come a long way as far as design and function. Also known as nail decals or nail tattoos, nail stickers are individual pieces of nail art that you can apply to your natural or acrylic nails or over polish to add some pizazz to your manicure.
Nail stickers come in two common types: self-adhesive and water-transferable. Self-adhesive nail tattoos will have an adhesive backing to apply the decal to the nail. Water-transferable decals are soaked in water to remove them from the protective backing and then applied directly to the nail.
Nail Stickers vs. Nail Stamps vs. Nail Polish Strips
If you thought all the salon options were confusing, wait until you find out how many different options there are for nail art! Let’s take a look at each category.
Nail Stickers
These are individual stickers or decals placed on the nail to add detail. They usually come as pre-cut decals in a specific pattern or design that you can add to your polished or bare nail. They can also be added to press-on or acrylic nails. They can be self-adhesive or water-transferable.

Nail Stamps
For those interested in more intricate nail art, there are nail stamps. Nail stamping can be an art in and of itself.
In this process, you apply nail polish over a metal plate with designs etched into it, then use a rubber stamper to pick up the design from the plate and stamp it over your nail. This technique is more involved but can be customized with ultra-fine, detailed designs. They are also easier to remove, as it is all polish.
Nail Polish Strips
Nail polish strips, also known as nail wraps, are adhesive strips made of nail polish. Polish strips come in nail-shaped appliqués, which you can easily apply and file to shape your nail. Boasting an “all-in-one” finish, nail polish strips typically last up to 10 days if used and stored correctly.
Pros & Cons of Nail Tattoo Stickers
While nail tattoos sound a piece of cake, there are pros and cons to them you should know about before trying this art.
Pros
- Easy Application: Whether you go with a self-adhesive or water-transferable option for your nail stickers, the ease of application can’t be beaten. Using a tool like a pair of tweezers will also increase your application’s ease, ensuring perfect placement.
- Budget-Friendly: While I love a good salon manicure, sometimes the prices can get pretty steep! Using nail stickers or decals over your natural or painted nails can give you a salon-worthy manicure for half the price!
- No Damage: Unlike an acrylic or gel manicure, nail stickers don’t take off your natural nail layers and require no intense soaking in acetone.
- Easy Removal: Most nail stickers are easily removed by soaking your hands in warm water and merely peeling the sticker off.
Cons
- Sizing: One of the biggest cons of nail stickers is that they are hard to customize, depending on your nail. They typically are uniform in size, so if you have larger or smaller nail beds, you may have difficulty finding the perfect size.
- Application Malfunctions: While the application can be easy with practice, you may find it challenging to apply nail stickers with your non-dominant hand. They can also still chip or come off if applied too close to the edge of your nail.
- Allergies: Even though it’s rare, if you have sensitive skin or are sensitive to latex or any other ingredient in the nail stickers, you could have an allergic reaction from nail tattoos.
- Lack of Design: While there are many great nail stickers on the market, many of them can be repeats of the same designs. For some of the best creative designs, check out the listings from Etsy in this article.
Do Nail Stickers Damage Nails?
To answer this question simply, no! Nail stickers apply and remove easily without peeling off layers of your natural nail.
However, your nail beds occasionally need to breathe to stay healthy. Regularly allowing your nails to breathe without any polish or nail sticker, or other enhancement will ensure that your nails are happy and healthy.
Should You Apply a Top Coat over Nail Stickers?
To get the most out of your nail stickers, you will want to apply a long-lasting top coat over them, whether you apply them to your bare nail or over polish. Using a top coat will also get you that salon-visit shine. Otherwise, you risk them coming off prematurely.
How Long Do Nail Tattoo Stickers Last?
If applied correctly and used with a quality top coat (I love the Sally Hansen Insta-Dry Top Coat from Amazon in the red bottle!), your nail stickers could last up to two weeks. Every brand is different, so your mileage may vary.
How to Apply Nail Stickers Correctly?
- Apply a base coat to clean, dry nails. Nail polish is optional here, but if you want a specific color background, go for it!
- Trim larger stickers. If you’re using a nail sticker that is the full length of your nail, you may have to trim it back to fit on your nail bed. You can use manicure scissors to trim the sticker accurately.
For Water-Transferable Stickers:
- After you’ve cut your desired decal out and trimmed it to the size you want, soak the desired decal in a small bowl of water for 10-20 seconds to loosen the backing. It should slide right off.
- Using tweezers, place the decal in the desired spot on your nail. If you’re using a long, thin decal, such as a stripe design, apply it as close to your cuticle (but not touching it) as possible.
- Smooth out from the center to ensure fewer air bubbles under your nail decal.
- For both self-adhesive nail stickers and water-transferable, follow up with a long-lasting top coat.
For Self-Adhesive Stickers:
- As with water-transferable stickers, follow steps 1-2. As with the water-transferable stickers, you can choose whether to apply your self-adhesive nail sticker to a naked nail or use polish.
- Apply the sticker to the desired spot on the nail.
- To assist self-adhesive nail stickers in sticking around longer, use a blow-dryer to dry the sticker for a few seconds. Be sure to keep it on warm and not burn your nail beds.
- Finish off with a top coat.

How to Remove Nail Stickers Safely?
When you’re ready to switch up your manicure, there are a few different steps you can take, depending on your preferences.
- If your nail stickers have been on your nails for a long time and are already lifting at the edges, you can use an orange stick to lift the sticker off gently.
- For stubborn stickers, you can remove them in an acetone bath. Pure acetone can be found in any regular nail polish selection at most retailers. Pour enough acetone into a bowl to cover your nails and soak the nails for ten minutes.
- Remember to apply an oil or lotion of some sort to your cuticles to protect them during the acetone soak. Anything petroleum-based will do the trick!
- Don’t want to mess with acetone? If you’re sensitive to acetone, you can do a soak of warm water. After soaking your nails for a few minutes, the decals should easily peel off.
Whether you’re a pro at nail art or just starting with experimenting with nail stickers, if you follow the steps included in this article, you are sure to have a professional-looking manicure in no time!
Photos via @overglowedit, @itslinamar, Instagram