Every manicure kit comes with a cuticle pusher, but not everyone understands how to correctly use this ubiquitous little tool. What does it mean to push back the cuticle, and is it safe? What even is the cuticle, exactly? In this article, we’ll cover it all.
First, we’ll explain what the cuticle is and what cuticle pushers do. We’ll go over the surprising benefits of pushing back your cuticles and discuss the pros and cons of the different kinds of cuticle pushes.
Then, we’ve included a step-by-step guide on how to push your cuticles back safely. To finish things off, we’ll compare cuticle pushers to cuticle removers and even give you a few more tips for healthy cuticle care.
In this article:
- What Is Cuticle Pusher Used for?
- Cuticle Pusher Benefits
- Types of Cuticle Pushers
- How to Push Back Cuticles with a Cuticle Pusher
- Cuticle Pusher vs. Cuticle Remover
- Tips for Healthier Nails and Cuticles
What Is Cuticle Pusher Used for?
If you can’t guess from the name, a cuticle pusher is designed to push back the cuticle. What on earth does that mean, and how does it work? Let’s start from the beginning by talking about the cuticle.
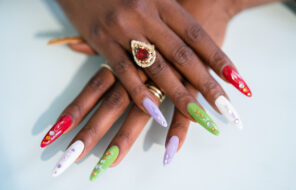
The cuticle is the little strip of skin that grows over the nail plate. The cuticle grows from the eponychium, which is the live skin that hides and protects the nail matrix, which is the root from which the nail grows. Unlike the eponychium, the cuticle is made up only of dead skin cells, and it helps to seal the gap between the eponychium and the nail plate to prevent infection.
Unfortunately, the cuticle also takes up precious real estate on the nail plate (especially if it’s really extended), and it can make the nails look shorter and stubbier. That’s why a large part of the prep portion in a manicure is spent either cutting back the cuticles or pushing them back closer to the eponychium.
To push them back, manicurists and hobbyists alike use a cuticle pusher, which is a thin stick made of wood, metal, or plastic and silicone. The cuticle pusher has a slightly curved or pointed end that presses up against the cuticle to push it back. It’s a simple tool, but it’s important to know how to use the cuticle pusher correctly to avoid damaging the skin around the nails.
Cuticle Pusher Benefits
Using a cuticle pusher is actually quite beneficial for your nails from both an aesthetic and health perspective. Here are the benefits of pushing back your cuticles.
- It makes the nails look longer and more elegant by reducing that overhanging skin.
- Pushing back the cuticles correctly prevents hangnails since there’s no excess skin that’s prone to ripping or getting dry.
- It prepares the nails for manicures by giving more space for nail polish.
- Pushing back the cuticles guarantees that gel manicures and nail extensions will last longer since it removes any excess skin from the nail plate that can compromise adhesion.
- If you’re a nail biter, pushing back the cuticles will help you resist the urge to bite or pick at your cuticles, keeping your hands overall neater and healthier.
- Unlike removing the cuticle, pushing the cuticle back has fewer risks when it comes to cutting yourself or breaking the skin.
Types of Cuticle Pushers
Cuticle pushers come in a few forms, from reusable metal to disposable wood. Here’s how you can choose the best cuticle pusher for your situation!
Metal
Metal cuticle pushers are very common. They’re hearty, long-lasting, reusable, and fairly easy to disinfect. Because they’re made of metal, they’re very solid, so they do a very good job of pushing back the cuticles.
They’re often fitted with one slightly curved end to push the cuticle back at the base and a pointed end that can help push the cuticle at the side of the nail or to cut off excess skin.
The main issue with metal cuticle pushers is that they can be too aggressive, especially for those with damaged or sensitive nails and cuticles. They’re a little likelier to scratch the nail plate or over-push (and even cut) the cuticle if used incorrectly. If you’re confident in your skills, we recommend the Flowery Pushit from Ulta.
Wood
Wooden cuticle pushers are becoming increasingly more popular. They’re disposable and can only be used once. This makes them great in a salon setting, where reusing tools from one client to the next can lead to infections.
Wood cuticle pushers are also gentler than metal ones. They’re softer, so they’re less likely to scrape or scratch the nail plate, and they’re usually also a touch less sharp than metal, so they’re less likely to nick the cuticle.
If you’re new to doing your own nail care, we recommend choosing a wooden cuticle pusher. Wooden cuticle pushers are also a better choice if you often do manicures for friends since one-use products are safer than using the same cuticle pusher on multiple people. Wooden cuticle sticks are usually sold in large sets, like this pack of 50 from Amazon.
Silicone
A silicone cuticle pusher is the best choice if you’d prefer something softer and gentler than a metal pusher but don’t want to have to throw it out after every use. The flexible silicone pushes the cuticle back gently (even more gently than a wood cuticle pusher), but you can use it over and over again. A silicone cuticle pusher will need to be replaced more frequently than a metal tool, but it’ll still last you for multiple months.
While it is possible to disinfect a silicone cuticle pusher, it’s not as thorough a cleaning as when you use a metal cuticle pusher. Because of that, we don’t recommend ever sharing a silicone cuticle pusher with anyone else. You should still disinfect your cuticle pusher after using it, even if it was just on your own nails. You can buy silicone cuticle pushers in small multi-packs, which makes it easier to replace them as necessary.
How to Push Back Cuticles with a Cuticle Pusher
Once you get the hang of it, using a cuticle pusher is quite easy! Here are our tips for a successful and hygienic process.
- Wash Your Hands
To start, wash your hands thoroughly with soap and water. This will remove any germs or bacteria that can cause issues should you cut yourself in the process.
- Soften the Cuticles
Next, if you wish, you can soften your cuticles with a 2-5 minute warm water soak (just remember that this might damage polish adhesion later on), or you can apply a liquid cuticle polish remover to dissolve some of the cuticle. Both of these practices are totally optional, but they’re very helpful if your cuticles are naturally a little tough!
- Clip off the Hangnails
Next, if you have any hangnails (little strips of torn skin or cuticle from biting or dryness), clip them off gently with a cuticle trimmer, being careful not to nick the actual skin.
- Push Back the Cuticles
Now you’re ready to actually push back the cuticle! With your cuticle pusher, carefully and gently push the cuticle down into the eponychium to reveal as much of the nail as you can. If you feel any pain or if you feel like you’re scraping against the nail, that’s a sign that you’re pushing too hard and you need to ease up. Keep your pressure light and gentle.
- Get Rid of the Residue
Finally, you may notice a little bit of white residue left at the base of the nail. This is the connective material that attaches the cuticle to the nail plate. Gently scrape it away with the cuticle pusher, or else it’ll prevent any polish you apply from adhering.
- Do Your Manicure
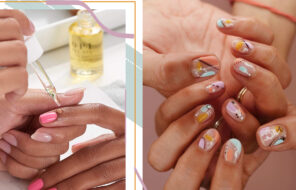
When you’re done pushing back the cuticle, you can finish off your manicure as normal. If you’re not doing a full manicure, just apply a light, nourishing layer of hand cream or cuticle oil.
Cuticle Pusher vs. Cuticle Remover
It’s easy to get confused between cuticle pushers and cuticle removers. Many manicurists actually use both when pampering the nails. In many cases, dual-sided metal cuticle pushers are actually fitted with a sharp edge that can act as a remover.
So, let’s quickly explain. Cuticle pushers are always tools designed to physically push the cuticle back.
Cuticle removers, on the other hand, can be tools like cuticle trimming clippers and sharp, knife-like tools. Alternatively, they can be liquids or gels that break down the cuticle to help it come off more easily. Cuticle removing solutions are made with potassium hydroxide, which is a caustic, highly alkaline compound that breaks down the dead skin that forms the cuticle, making it easier to simply scrub it away.
A cuticle pusher, when used in combination with a liquid cuticle remover, can actually end up removing the cuticle quite easily, despite not being especially sharp.
However, it’s important to remember that our cuticles do have a function! They are a barrier that protects the gap between the nail and the eponychium. Removing them entirely makes the skin around the nail more prone to bacterial and fungal infections. If you don’t have a lot of experience, you can also damage the nails or the skin around them while trying to remove the cuticle. Cuticle pushing, on the other hand, is a little easier and safer to do.
In general, it’s never advised to cut away the entire cuticle. On the other hand, removing it partially in a gentle manner while also pushing it back can work well and make your nails look clean, long, and elegant.
Tips for Healthier Nails and Cuticles
Pushing your cuticles back isn’t the only thing you can do to keep your nails and cuticles thriving. We have a few more tips to help you with that!
- Moisturize, moisturize, moisturize! Hand creams and cuticle oils help to keep your cuticles soft and supple, so they look nicer, and they’re also easier to push back. Moisturizing will also help strengthen your nails by keeping them more flexible and less prone to breakage. Make sure to moisturize your nails (and your hands while you’re at it) at least every night.
- When using a cuticle pusher, never go too deep or apply too much pressure to avoid scraping the nails or cutting the skin.
- The rest of the time, wear gloves when doing dishes or working in the garden to keep your nails and hands protected from water and harsh chemicals.
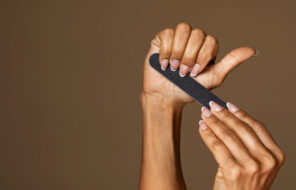
- Make sure to file your nails regularly to keep their tips smooth. This will prevent breakage, help you resist the urge to bite or pick, and it will keep your nails looking nice. When you file, use a softer grain, and always go in one direction to avoid putting pressure on the nail plate.
Photos via @phoebesoup, Instagram