An eyebrow stencil can come in handy when you do your makeup or before tweezing your brows! Below, we explain who can benefit from an eyebrow stencil and who should give them a miss. Finally, we have a guide that’ll make it easy for you to use your brow stencil and end up with gorgeous, natural-looking brows.
Do You Really Need an Eyebrow Stencil?
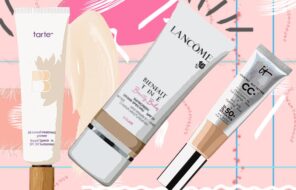
As you saw, eyebrow stencils come in a few different formats, but in general, the one thing they all have in common is that they give a clean and precise eyebrow shape. Now, whether that’s actually right for you depends on your natural brow situation as well as your preferences.
The people who often benefit the most from an eyebrow pencil are those who have very thin, pale, or simply non-existent eyebrows. The less hair you naturally have, the harder it can be to fill in the eyebrows with a consistent shape, which is why brow stencils are so helpful.
If you like the look of lightly shaded-in brows or pristine Instagram brows, a brow stencil can work really well! On the other hand, for feathery and fluffy-looking brows, a stencil is not as good of a fit.
If you’re already a pro (or even just decent) at filling in your eyebrows, you probably don’t need an eyebrow stencil. You also won’t find a stencil useful if you already have nicely shaped brows that only need to be filled in for additional density. However, if getting your eyebrows to match is always a serious struggle, it’s worthwhile to try.
How to Use Eyebrow Stencils Like a Pro
If you’re using brow stencils to help you with your makeup, you can do your brows at any point in the application, although, be aware that the stencil might slightly disturb your foundation, and you might have to touch it up. You can also use the stencil to draw an outline for your brows, so you don’t over-tweeze them.
- To start, first choose the right stencil for you since most kits come with multiple options. To select, simply line the stencils over your brows until you find the one that fits in with your natural shape most seamlessly.
- You may find that a few of them can work, or you might want something bolder than your natural brow shape, which is fine. You can definitely play around with different brow stencils and enjoy the variety!
- Next, it’s time to actually line up the stencil with your brows. The best way to do this is to measure the stencil against your nose or eyes to ensure the placement is consistent on both sides. Keep your face relaxed while doing this, because if you move your brows at all, it can mess up the placement of the stencil.
- The front of your brows should line up with the end of your nostril and the inner corner of your eye, while your tail should line up with a diagonal line that goes from the end of your nostril and over the outer corner of your eye.
- What you can do is fit the stencil over your eye and then use a pencil or a long stick to measure against your nose and eye to adjust the placement.
- With the stencil firmly in place, use your eyebrow makeup product of choice to draw in the outline of your brow.
- Let the stencil guide you, especially over your problem areas – if you have an easy time filling in your tail but find that your arch gets wonky, then focus on following the stencil for the arch.
- For the fastest results, use an eyebrow powder with a larger brow brush.
- Once your outline is all done, you can fill the rest of the brow in with the stencil still on, or you can remove it.
- In general, it’s better to choose a lighter brow color when using a stencil since the final result can often look darker than you’d expect.
- Be very careful when working on the front of the brow with the stencil on. A common mistake is filling the brow in too solidly at the front, which can look blocky because of the straight lines of the stencil. Use the stencil at the front as a guide for how close together your brows should be but keep the front lighter and more feathered for a more flattering look.
- Mistakes can happen even with a stencil. Use a slim brush or cotton bud dipped in concealer to clean up any errors or to sharpen the look of your tail.
- When you’re done with the stencil, chances are it’ll be a little dirty from your makeup, so wipe it with a wet wipe so it’ll be ready for next time you need it.
Photos via @nikki_makeup, Instagram