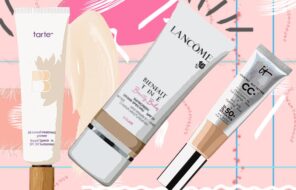
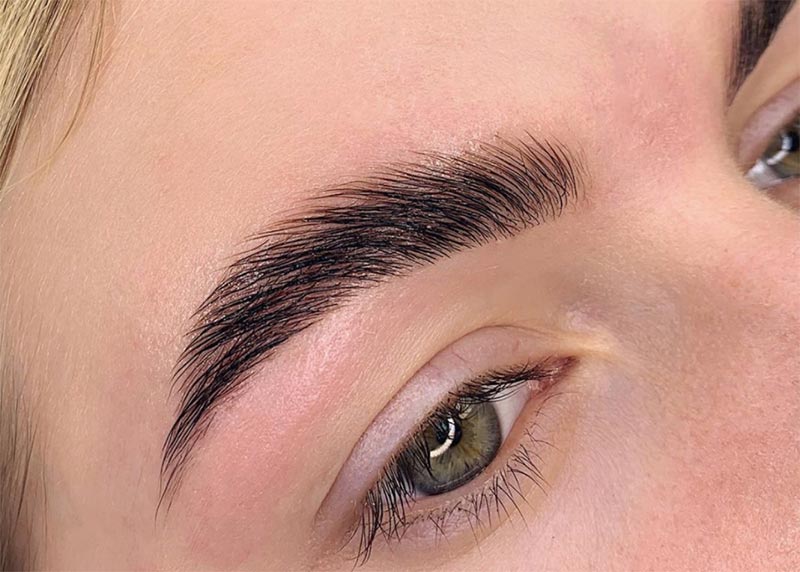
- Eyebrow lamination is a straightening treatment that restructures brow hairs to lift them vertically in the desired shape, creating thick, fluffy, fanned-out brows.
- It’s a non-invasive treatment that can last up to 8 weeks.
- Eyebrow lamination can be done at the salon or at home when you use a brow lamination kit.
- You can combine it with brow tinting or microblading, too.
Lift your brows up to the next level with brow lamination! This trend took over beauty salons and social media, giving women a semi-permanent fanned-out brow look. If you’re a fan of the “boy brow” look, are constantly in search of the strongest brow gel, and have fallen in love with soap brows, then you should definitely try eyebrow lamination next!
We’ve created a comprehensive guide to eyebrow lamination, explaining exactly what it is. We detail all of the pros and cons, explain who will benefit the most from brow lamination, and even explain how it differs from other common brow services like tinting and microblading.
We go through the step by step process of how eyebrow lamination is done and also discuss the safety and science of it. We also answer some burning questions, like how long it lasts, where you can find good brow lamination kits for DIY, how much it costs, and what’s the best aftercare for it. Finally, in case you change your mind, we added removal instructions, though we hope you won’t need them!
In this article:
- What Is Brow Lamination?
- Pros & Cons of Eyebrow Lamination
- Who Is Brow Lamination Best for?
- Brow Lamination vs. Tinting vs. Microblading
- What’s the Process of Brow Lamination?
- Science and Safety of Brow Lamination
- How Long Does Brow Lamination Last?
- Eyebrow Lamination Aftercare
- Eyebrow Lamination Costs
- How to Remove Eyebrow Lamination?
What Is Brow Lamination?
Brow lamination is essentially a perm for your eyebrows. It involves two main solutions, which work together to help straighten the brows and lock them into place. It’s done with the same kind of materials that would be used for an eyelash lift, which is the kind of kit most people end up using when doing eyebrow lamination at home.
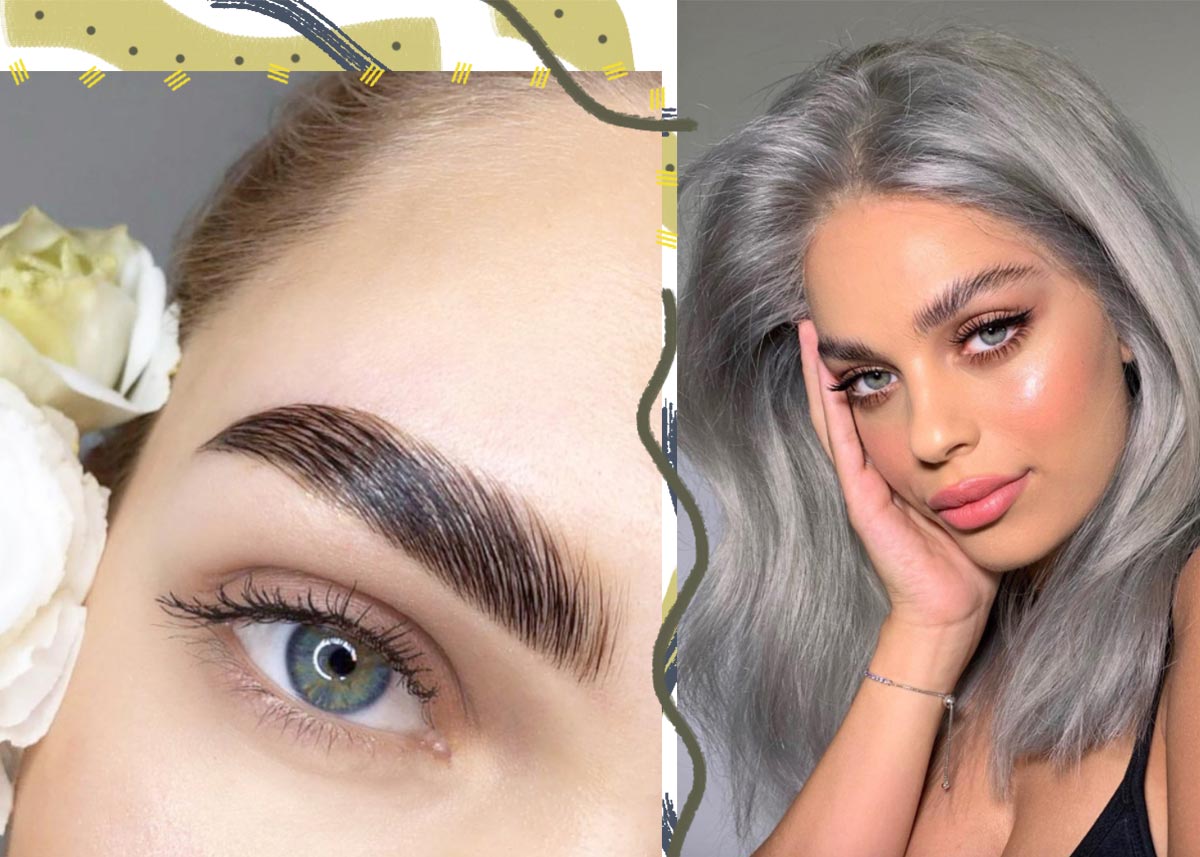
The procedure ends up creating brows that are wider, lifted, more arched, and fluffier-looking – in other words, today’s trendiest look. If you find yourself coveting the brows of the influencers on your Instagram feed, keep reading to learn how you can also achieve that look!
Pros & Cons of Eyebrow Lamination
To figure out if eyebrows lamination is for you, it’s important you know all of the positive and negative aspects of getting it done.
Pros
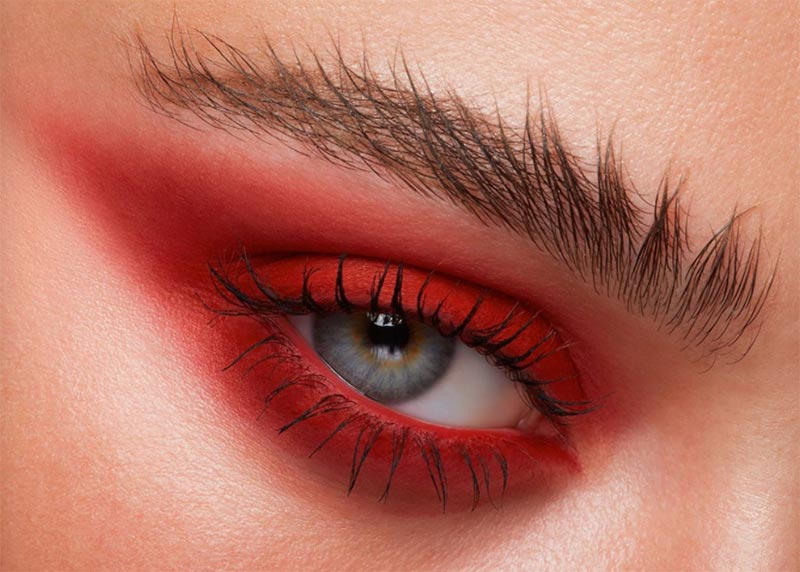
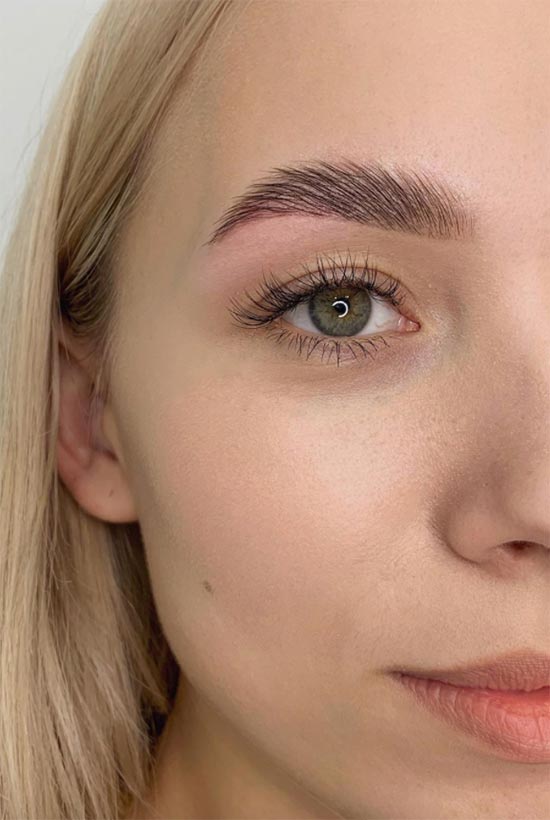
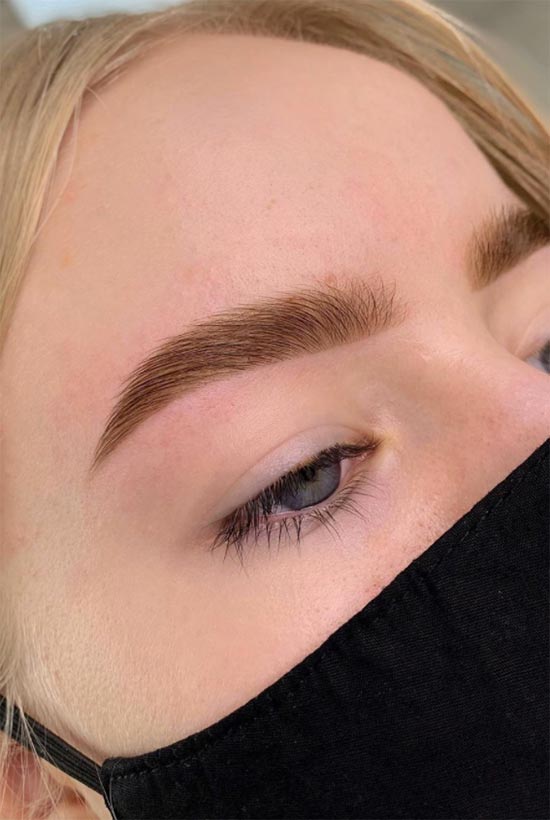
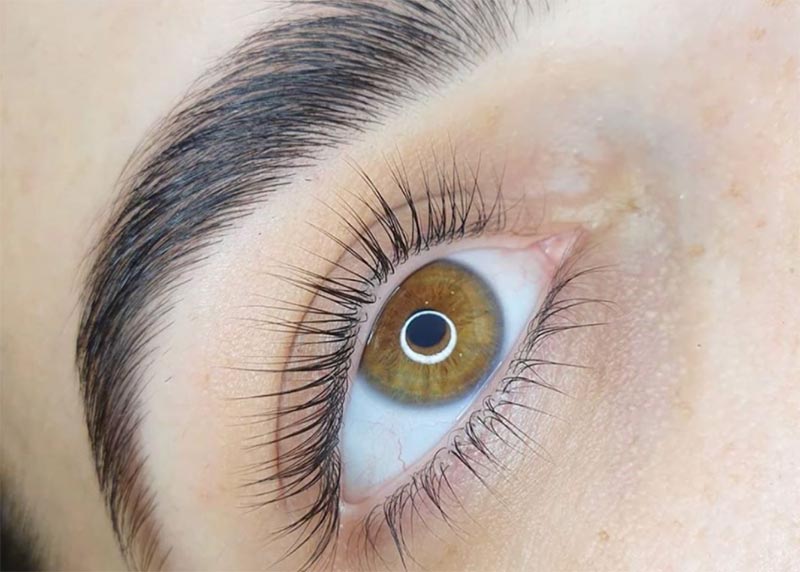
- Eyebrow lamination gives the eyebrows a beautiful brushed-up look. The brows look fanned-out, groomed, and thick.
- It helps groom messy, easily tangled, or curly brows.
- Lamination can make thin brows look thicker and fuller.
- It lasts for up to 6 weeks, saving you grooming time in the morning.
Cons
- The perming solution will slightly dry and weaken the brow hairs.
- Some may have an allergic reaction to the different materials used in brow lamination kits, so it’s important to patch test the different solutions first, especially if you have sensitive skin.
- If the eyebrows get over-processed, the hairs can turn frizzy.
- The aesthetic of having brow hairs that stick straight up isn’t for everyone, so look at a lot of before and after shots to make sure you like the brow lamination effect.
Who Is Brow Lamination Best for?
The truth is that anyone who likes the way laminated brows look is a good candidate for it! If you want cleaner, more fanned-out, or thicker brows, it can’t hurt to try. This procedure is non-invasive, so there are almost no risks associated with it.
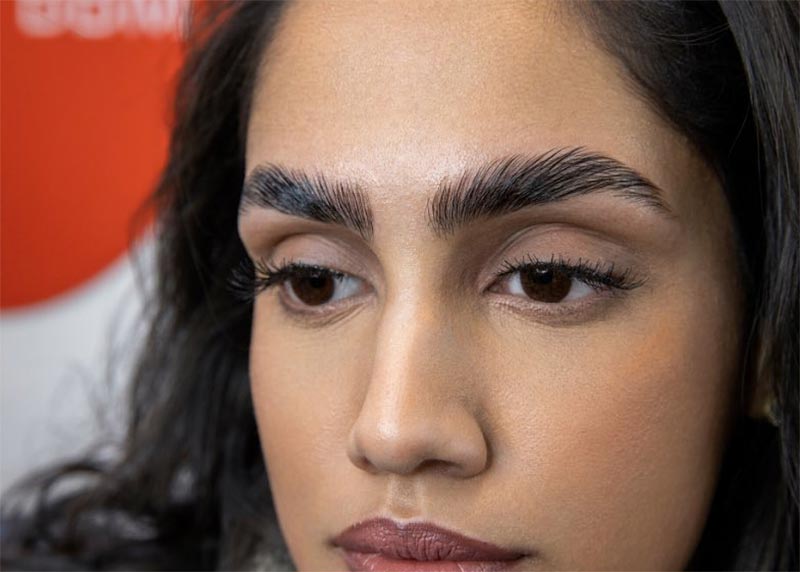
That said, it is truly fantastic and a game-changer for those who have curly or easily tangled brow hairs since it helps to straighten out the individual hairs in a way that prevents tangling to keep the brows looking neat. For those with thin brows, especially if the brow hairs themselves are long and evenly spaced, it is also a great choice because it quickly increases the thickness of your brows. It can look good regardless of whether the hairs are sparse or dense.
Note that if you have prominent bald spots, brow lamination won’t mask them and might even emphasize them, although, selective and clever brushing and shaping can somewhat prevent that.
Brow Lamination vs. Tinting vs. Microblading
While lamination is fantastic, it might not solve all of your eyebrow woes. For example, if you have a lot of big gaps in your brows or very uneven brows that do not look more symmetrical even when brushed up, then you might be a better candidate for microblading. Microblading is a shallow tattooing technique that gives realistic, hair-like strokes to reshape or fill in bald spots in the brows.
There is also eyebrow tinting, which is a procedure where the brow hairs are dyed with a gentle, brow-safe dye. Unlike tinting, brow lamination will not darken your eyebrows. If your brows are very pale and not noticeable unless you’re wearing brow makeup, then you might be a better candidate for eyebrow tinting.
However, the great thing about brow lamination is that it can be done in conjunction with both tinting and microblading! When it comes to tinting, you can do it on the same day as lamination.
When it comes to microblading, you will probably want to have your brows microbladed first and then wait for them to totally heal before also having them laminated. It’s better to go to the same professional for both services to guarantee a harmonious look.
What’s the Process of Brow Lamination?
Depending on the manufacturer, the specific eyebrow lamination kit you choose, or the salon where you get it done, the lamination process can be slightly different, although, in general, it follows the same basic steps.
If you’re doing this at home, you will need: an eyebrow/ eyelash perm kit, cling film, cotton buds, a cleanser or oil-free makeup remover, a clean mascara spoolie or an eyebrow comb. A small synthetic liner or concealer brush and your favorite latex-free eyelash glue can also be helpful.
- First, the brows must be cleaned. Since you won’t be able to get your face wet afterwards, we recommend washing your entire face thoroughly using a good facial cleanser. You can moisturize as well, but avoid the brow area, which needs to be totally clean and dry. At the salon, your brow tech will probably wipe your brows down with a professional cleaning solution.
- Next is the time to form an action plan. At a salon, you should sit down for a consultation with your brow stylist before anything starts, but at home, you’re flying solo. With a spoolie or an eyebrow brush, play around with brushing your brows to figure out the shape you’d like. You can brush them straight up for maximum lift, have them on a bit of a diagonal for a softer look, or combine straight-up at the front with diagonal at the arch and tail for a mixed look.
- The next step is to apply lash glue to the brows in order to set them in place, so once you perm them, they will get stuck in the same position. Those who use a brow lamination kit at home often choose to replace the glue in the kit with their own favorite lash glue, although we’d recommend choosing a latex-free one.
- Apply the glue either directly from the tube with the applicator or with a little brush or cosmetic spatula. Immediately after getting the glue on the hairs, brush them with a spoolie in the direction you’d like. Work quickly and in small sections, so the glue doesn’t dry down before you finish brushing the hairs. This is the most important step, so take your time with it.
- Once you’re happy with the way your brows look, you can apply the perming solution with the enclosed applicator, a cotton bud, or (our favorite) a clean brush. Simply brush it over your brows, so they are covered but not heavily saturated with the lotion.
- Next, it’s time to literally “laminate” your brows. Use cling film cut at the right thickness to cover both of your brows (around 3 inches wide) and gently smooth it over your brows in order to keep the hairs out and allow the perm to process. Follow the directions on the package, but generally, you should wait between 8-10 minutes for the perming solution to do its job.
- The next step is to remove the cling film and use a clean spoolie or cotton bud to remove as much of the perming lotion as possible.
- This is followed by another “fixative,” which is actually more of a neutralizer for the perm. It’s applied to the brows the same way and covered with cling film for 8-10 minutes, as well.
- Once the time passes, and the cling film is removed, the next goal is to renourish the lashes with a moisturizing oil (you can use whatever face oil you have on hand, or the oil from the kit).
- Finally, any lash glue remnants can be wiped off of the brows with the help of the cleanser included in the kit, and that’s it! Your brows are now laminated!
- Immediately after lamination, you can tint, trim, wax, or tweeze your brows if you like.
Science and Safety of Brow Lamination
If you’re anything like me, when you read about these kinds of beauty treatments, you wonder about what it is that makes them work. Beyond curiosity, I also want to know what’s in something before I put it on my face, where it might have a negative effect.
So, what’s in eyebrow lamination kits, and how do they work? The two main steps of brow lamination are the “perming” and the “neutralizing” or “fixative” solution.
The active ingredient in the first step (the perming solution) is called ammonium thioglycolate. This chemical is often used in hair perms, dyes, and relaxers. This alkaline chemical works by breaking or reducing disulfide-bonds in the hair. These are the bonds responsible for the integrity and shape of the hair, so once they get disrupted, the hair strand becomes more malleable, and it can be reshaped.
The active ingredient in the second step (the neutralizing solution) is usually sodium bromate, a sodium salt that helps stop the perming effect of the first solution and to lock the hairs into a new shape after they’ve become more permeable. However, sodium bromate has been banned in Canada and Italy since it has carcinogenic potential with regular inhalation exposure (this is riskier for aestheticians using it regularly rather than for users at home only coming in contact with it every few months).
As a result, some companies have started making new formulas based on hydrogen peroxide instead. The hydrogen peroxide solution acts similarly to the sodium bromate and usually has faster processing time.
It is undeniable that these are some intense chemicals, but generally, they don’t cause issues for users. When used for eyelash lifts, some users can experience mild eye irritation from these ingredients, although it tends to subside shortly after the procedure is over.
For the eyebrows, however, the skin is less sensitive, and there is a less direct risk to the eyes. With all this said, it’s always a good idea to conduct patch tests before applying anything to your skin too liberally, and you should always be careful not to leave any of these products on your skin for longer than the packaging directs.
How Long Does Brow Lamination Last?
Assuming you care for your brows properly, eyebrow lamination can last up to 8 weeks. In other words, it’s a semi-permanent treatment that requires some commitment but saves you a ton of hassle. Fortunately, it’s not totally permanent, which is useful in case fanned-out brows ever stop being trendy.
Eyebrow Lamination Aftercare
Eyebrow lamination is as low-maintenance a beauty service as can be. The most important aftercare detail is that you don’t let your eyebrows get wet for 24 hours after doing the procedure. That means no shower, no face washing, no swimming, and no getting caught in the rain. Otherwise, the water will ruin the perm, and your brows will go back to normal – all that money and hard work will go down the drain.
However, once the 24 hours pass, you can go back to mostly normal! Keep your laminated brows nourished with a gentle oil in order to make up for the slightly damaging effects of the perming solution. If you already have a favorite hair or face oil, you can just use that, and your face moisturizer can also do the trick once the 24 hours pass.
Brushing the brows regularly will also help them stay in place as new hair growth starts replacing the permed brow.
Eyebrow Lamination Costs
In general, you can expect to pay between $50 and $200 for the service, with some salons offering it in conjunction with other brow services like waxing and tinting.
The cost of salon services varies greatly from city to city and country to country. If you live in a big, expensive city, then chances are that eyebrow lamination services are going to be on the pricier side, while they will probably be more affordable in a place with a lower cost of living.
You can also expect to pay more if you go to a high-end salon or a celebrity brow shaper, as opposed to your local salon with an unknown technician. However, that’s not to say that paying less means you’ll end up with worse results – the key is to go to a salon you can trust, either by reading reviews, looking at before and after photos, getting recommendations or by consulting with the aesthetician.
How to Remove Eyebrow Lamination?
Eyebrow lamination isn’t for everyone (this is the part where I admit that I, personally, don’t like the look), but it can be tricky if you change your mind after getting it done.
If you realize immediately after laminating that you totally hate the look of it, wash your brows with water as soon as possible in order to disrupt the perm before it has set. You can follow that up with a layer of face oil to lock some of that water next to the hair, as well as to help fortify the brows.
If it’s already been more than a day, there is unfortunately not much you can do. Brushing through the brows might help you alter their direction slightly, and you can also try applying a strong brow gelto keep them down.
Otherwise, you simply need to wait for the lamination to grow out. You can help the process along by applying a hair growth serum like Revitalash from Amazon and by regularly trimming the hairs. This will help shorten the amount of time it takes for the lamination to fade.
Photos via @beautyloungesthlm, @nikki_makeup, Instagram