*The author generated this text in part with ChatGPT, OpenAI’s GPT-3 large language model. The content was reviewed, edited, fact-checked, and revised by our editorial team.
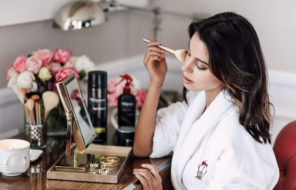
We like to think of applying eyeshadow as an art. Using your lids as a canvas allows you to create a natural look for classy events or make your eyes pop for a bolder statement. While eyeshadow can be applied creatively to evoke certain emotions or enhance your natural beauty, it can also be a bit intimidating at first — especially if you’re unsure where to begin.
This step-by-step guide will help you take your makeup artistry skills to the next level. Stick with us, and you’ll be applying eyeshadow like a pro in no time.
1. Gather your products
First things first, prep your look by gathering all the makeup products you need to achieve your desired look. Some essentials include eyeshadow primer, a few shadows in different shades (from single eyeshadows or a full palette), a high-quality brush, and a blending brush.
The colors you choose should complement your skin type and tone. For example, if you have oily or sensitive skin, look for oil-free and non-comedogenic eyeshadows. We suggest starting with neutrals like browns and taupes because they’re easy to work with and can be worn both day and night. Our guide to choosing the best eyeshadows for your skin tone and eye color can help you find the perfect options.
2. Apply primer
Primer will act as your initial base, helping the eyeshadow adhere to your eyelids and stay in place all day long. Start the process by applying primer all over your lids, up to the brow bone, as this will lay a smoother foundation and prevent smudging or creasing — two primary factors that affect your makeup’s longevity. When learning how to apply primer, remember that a little bit of product goes a long way. No need to overdo it!
To round out this step, you’ll also want to choose the lightest shade you have and use the eyebrow brush to paint it over your eyelids, up to the crease, as your base color. And voilà! You’ve laid your foundation.
3. Start at the crease
Next, take a medium shade and use the brush to apply it to the crease of your eyelids. This will add depth and dimension to your look. Use the blending brush to soften the edges of the color and make sure there are no harsh lines.
4. Paint the rest of your lid
Choose a dark shade and use the brush to apply it to the outer corners of your eyelids, blending it into the crease. This will help to create a smoky effect. Again, you’ll want to use the blending brush to soften any harsh lines. The darker the colors and the more eyeshadow you apply, the more dramatic of a look you’ll achieve.
5. Accentuate your features
Once you’re satisfied with how your look turned out, you can accentuate your natural features with lengthening mascara, eyeliner on your waterline, and a bold red lip. Choose your perfect blush, add some highlighter to your cheekbones, chin, and bridge of your nose, and you’re all set for a night out.
Understanding color theory
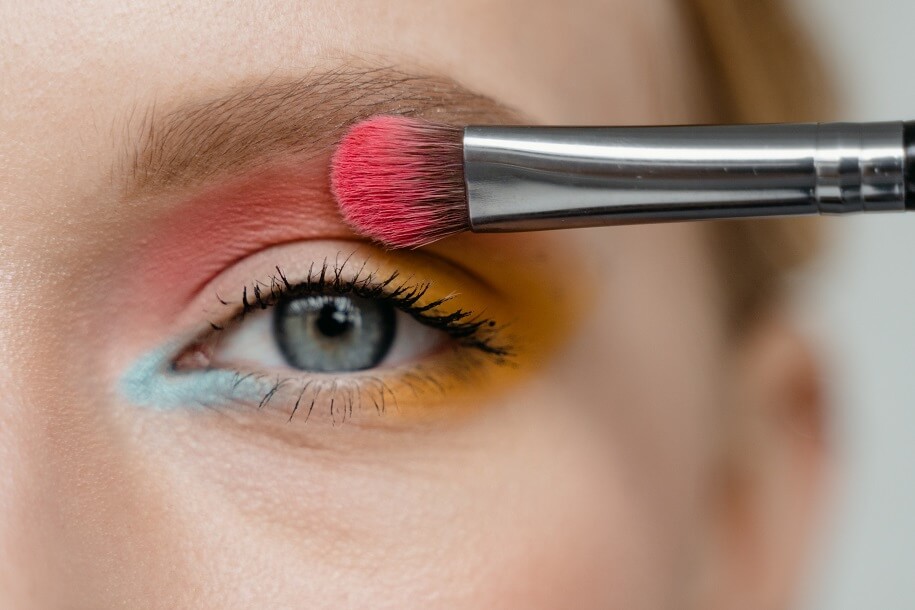
Your eyeshadow lesson can’t be complete without learning a little bit about color theory — the study of how different colors interact and how they can be used to create visual harmony. When looking at a color wheel, colors opposite each other tend to create a high level of contrast for a complementary effect. For example, red and green go well together, as do blue and orange and yellow and purple.
When thinking about your eyeshadow look, it’s important to know that versatile neutrals like browns, beiges, and grays are often used to create a subtle, natural look — which is why we recommend them for newbies. Bright shades of blue, green, and purple, on the other hand, can create bolder looks, adding a pop of color to make your eyes appear brighter and more awake.
Bright pinks, oranges, and yellows can add a playful spark of color and be used as a statement shade on the lids or as a highlight in the inner corners of the eye. Neons and pastels are also ideal for creating bold, unique looks. They work best in the summer and spring, specifically for festivals and parties.
Metallic shades like gold, silver, and copper can be used to create shimmer. They’re perfect for special occasions, as they add a touch of glamour to any eye look. Deep shades of red, burgundy, and plum can create a dramatic, smoky appearance.
Before we let you spread your wings and fly, we want to point out one more thing: color temperature. When selecting the right shades, notice if it has a cool or warm temperature. Cool colors like blue, green, and purple are often described as calming, while warm colors like red, orange, and yellow are more energizing.
From newbie to pro
Now that you’re equipped with the basics, it’s time to take things into your own hands. Do some more research on color theory, watch eyeshadow tutorials from your favorite beauty influencers on TikTok or YouTube, and don’t be afraid to take leaps when experimenting with different makeup looks. The more you practice, the more confident you’ll feel, and pretty soon, you’ll advance from newbie to pro!