Even though we know that you shouldn’t rely too heavily on hot tools to style your hair, we can’t deny that they can make getting ready significantly easier. But it’s easy to end up with a cluttered bathroom vanity if you’re shifting back and forth between too many different hot styling tools. Thankfully, if you choose wisely, you can find the perfect hair straightener that can pull double duty to straighten and curl your hair.
Also, note that hair straighteners can also be referred to as flat irons. Still, learning how to use a hair straightener to curl or straighten your hair does have a slight learning curve. But, once you master it, you’ll be ready to give away your curling irons and wands! For the best results, we recommend following the steps below and paying special attention to the tips too.
In this article:
How to Straighten Hair with a Flat Iron
Let’s start with the basics – straightening your hair. This is the most obvious thing you can do with a flat iron, and it’s where your learning process should begin. If you’re focused on a sleek look, you’ll want to get all your tools assembled before you begin. This includes your flat iron, comb or brush, a heat protectant, and clips to section your hair. Before you start, make sure your hair is completely dry, as wet hair plus high heat equals damage.
- Detangle and Section Your Hair
It’s hard to effectively flat iron tangled hair. So, your first step is to detangle it. If you’re using heat protectant spray, begin by spritzing your hair. If you’re using a hair serum, apply a small amount to the palms of your hands, emulsify and spread it throughout your hair. Avoid using too much (especially with heavier serums), as this can encourage heat damage.
Working in sections, slowly detangle up the hair shaft from tip to roots. Keep in mind, though, that depending on your hair type, you might find that it’s more efficient to detangle as you go. This is especially true for anyone with very curly or coily hair who’s opting to use the chase method on hair that hasn’t been previously blown out. - Section off Your Hair
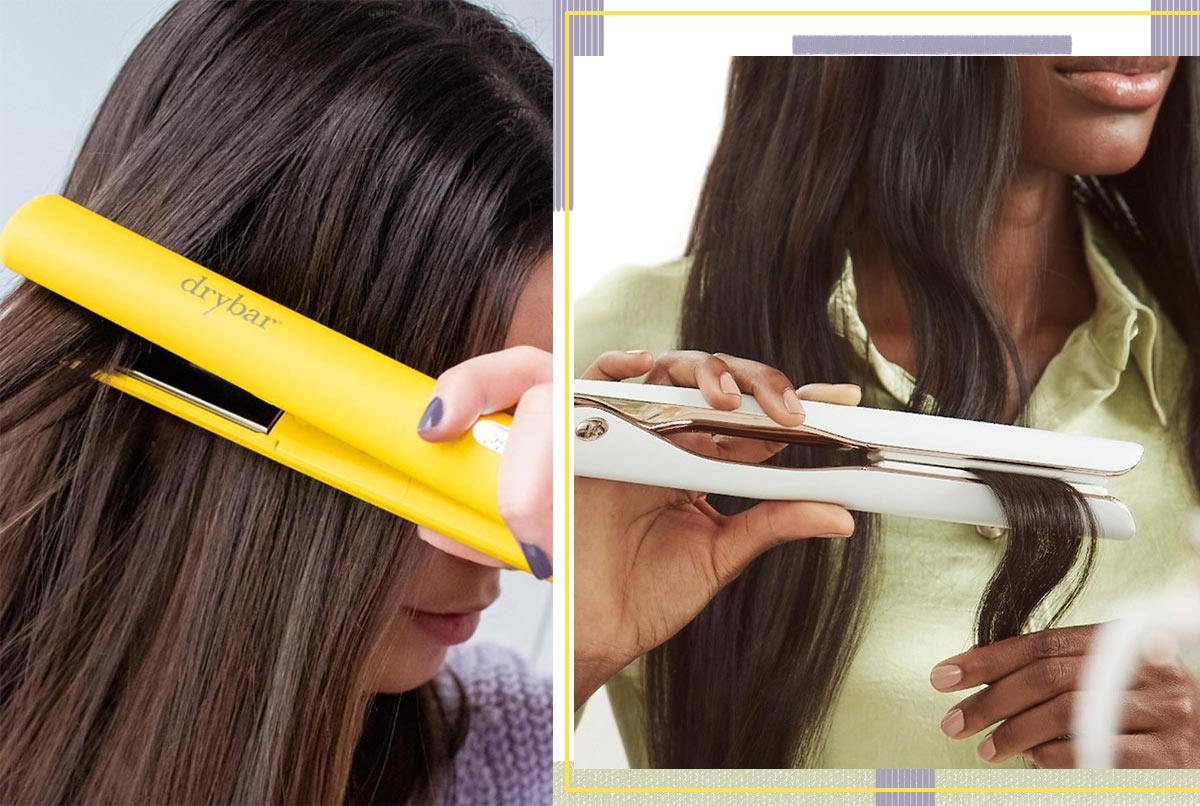
Now that you’ve detangled your hair, it’s time to section it so that it’s more manageable as you work through it. You can either use duck or alligator clips. Typically, you’ll want to create larger general sections (i.e. four quadrants) and then work through each part, creating smaller sections as you go. Keep in mind that if your goal is sleek, straight strands, you never want to try to force too much hair between the flat iron plates. If you do, the heat won’t reach all of the strands, and your results will be uneven.
- Set Your Flat Iron Temperature
These days, most flat irons can heat up in as little as a minute, if not less time. So, while you’re detangling your hair, turn on your flat iron and set it to the desired temperature. Ideally, by the time you’re done detangling and creating large sections, your flat iron should be ready to use. Remember to match the temperature to your hair type and avoid using too high a heat unless the style specifically calls for it (i.e. Brazilian keratin straightening or silk presses).
Your goal should be to set the temperature so that you can effectively straighten your hair in a single pass. If you have to go over the same section of hair multiple times to get the desired results, your setting is too low. 300 to 340 degrees Fahrenheit is a good starting range for most hair types.
However, if your hair feels too hot or you smell burning, turn the temperature down. If your hair looks unchanged after running a flat iron over it or the results are inconsistent, bring the temperature up slightly. - Create Smaller Sections
It’s always best to start at the nape of your neck and work up towards the crown. Begin by creating a mini section that’s no more than an inch wide. And remember not to make the section too thick – especially if you have thick, curly, or coily hair – as the heat won’t effectively penetrate all of your strands.
- Flat Iron the Smaller Section
Be sure that you have a sturdy grip on the flat iron and place it so that the plates are close to the roots. Avoid placing them directly on your roots as you might accidentally burn your scalp, nape, ears, or forehead, depending on how close to the edge of the flat iron the plates are located.
Once you’ve positioned the flat iron so that the two plates are surrounding the section, squeeze so that the hair is flat between the plates. However, this is where the flat iron learning curve for straightening hair can be an issue. The goal is to create enough pressure with your hands that the hair is held taut between the two plates – but not so tight that the plates can’t glide smoothly over your hair. - You’re Doing It Wrong If…
If the plates are dragging against the hair and you notice indentations or sharp bends in your hair where the plates were previously gripping it, you’re using too much pressure. You should be able to glide the plates from root to tip in a single smooth motion without any resistance. Resistance means that you’re either using too much pressure or trying to tackle sections that are too thick. And remember, take your time!
- Chase Method (Optional)
This is a step that’s optional, depending on how straight you’re trying to get your hair and your starting hair texture. If you have naturally straight hair and you’re simply working on getting rid of light frizz or flyaways, you may not need to use the chase method.
The chase method is a two-handed process for straightening hair that ensures the hair is sufficiently taut throughout the flat ironing process. It’s particularly effective for curlier textures that tend not to respond as well to the standard flat iron process because simply holding the hair in your free hand doesn’t stretch the curl pattern enough for the entire hair length to come into consistent contact with the heat. Similar to the standard method, you’re going to work with a small one-inch-wide section of hair.
Depending on how curly or coily your hair is, you may need to detangle at this point – especially if you plan on using a fine-tooth comb or a bristle brush. With one hand, you want to position the comb or brush far enough from the roots of your hair so that you can easily position and close your flat iron in your other hand around the section of hair, but above the comb/brush.
So, your flat iron should be between your roots and the comb/brush. Once the flat iron is closed, slowly glide it down the section of hair, moving the brush/comb in unison completely through the length of the hair. Continue this process throughout the hair. - Finish with a Serum or Light Oil
Once you’ve finished flat ironing your hair, work through the strands with a light serum or hair oil. This will help to contain any flyaways as well as offer a nice shine and infuse moisture.
Curling Your Hair with a Flat Iron
Once you’ve mastered the basics of straightening your hair with a flat iron, you’re ready to upgrade to the next level of flat iron functionality – curling. It might seem counterintuitive to use a tool designed to straighten hair as a curling iron.
But it’s incredibly effective and also means that you have one less styling tool you’ll have to store in your bathroom cabinets. There is a slight learning curve for curling with a flat iron, as you need to master the required turning motion that creates the curl.
Still, the same basic guidelines apply when using a flat iron, regardless of whether you’re curling or straightening your hair. This includes:
- Don’t work on dirty hair
- Always detangle first
- Use a heat protectant
- Work in small sections
- Use the right temperature
- Mind your plate pressure
- Finish with a serum or light oil
Plate Width Matters
Before you start curling, you need to have the right plate width for your flat iron to effectively curl your hair. Usually, a one-inch-wide flat iron is the ideal width if you want to have the versatility to switch between using it as a straightener and a curler. Anything wider than an inch might be too large, making it difficult to create curls. However, people with very short hair might be better off with a half-inch-wide flat iron.
For Spiral Curls
Classic spiral curls are a great style that flat irons can achieve.
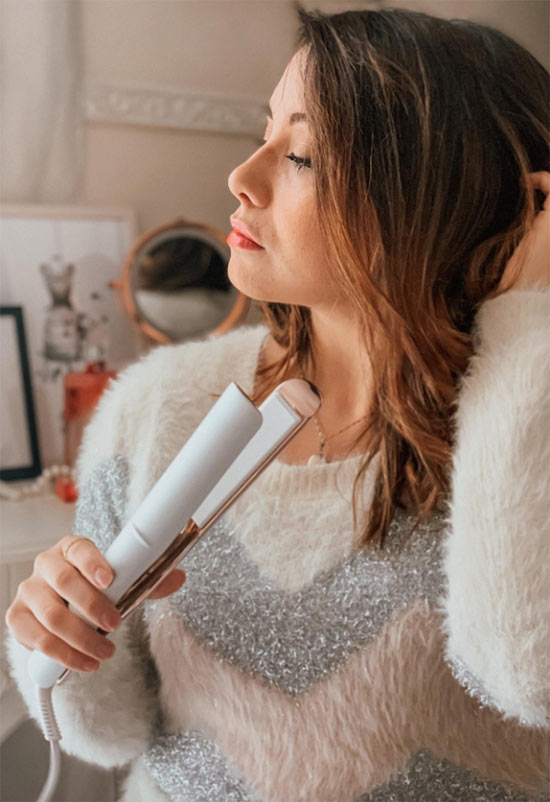
- Begin by holding the flat iron so that your thumb is on the top plate. Working roughly one inch from the root, slowly glide the flat iron down to around half the length of your hair.
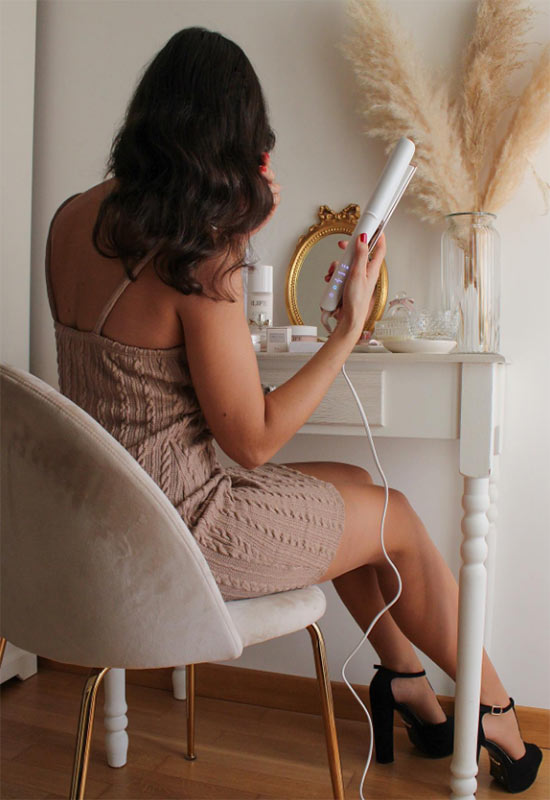
- Once you reach the halfway point, slowly rotate the flat iron a full 360-degree turn – being careful to ensure that the hair is still smoothly gliding through the plates and angled to prevent overlap on the hair being fed into the plates. Once you’ve completed the turn, continue working down the length of hair, feeding the hair around and through the plates until you’ve completely covered the length of the section.
- Continue this process throughout your hair, being sure to work in small sections. Additionally, take your time, as working too quickly may cause inconsistent curls. And as with straightening your hair, mind your pressure. If you use too much pressure, you’ll create harsh bends, which will ruin the look of your curls.
For Relaxed Waves
With relaxed waves, you’re going to follow the same process as with creating spiral curls but with a slightly modified technique. While the 360-degree rotation down the length of the hair is the same, you’re going to work in the opposite direction when working on the second half of your hair (i.e. right versus left).
And when finished, you’ll want to brush, comb, or finger tousle your hair to break the individual spiral curls and create soft waves. But as with straightening or spiral curls, you’ll want to use a serum to prevent flyaways, lock in shine, and add moisture. If needed, use a hairspray to hold the style.
Pro Tips for Flat Irons
Using a flat iron is one of the easier hot styling tools that you can use. Before you head to the mirror to start straightening your hair, you need to make sure that you’ve picked the right tool for the job.
1. The Flat Iron You Use Matters
Not all flat irons are the same. And depending on your hair type and texture – as well as the type of style you’re trying to achieve – you’ll want to make sure that the hot tool you select is compatible.
For example, many flat irons can reach temperatures as high as 450 degrees Fahrenheit, but most people, even with very coarse hair, don’t need heat this high to straighten their hair. But, there’s a caveat, if you’re trying to perform an at-home keratin treatment or a silk press, you’ll need consistently high heat to get the desired results.
Consider the Temperature Settings
Some flat irons are designed to only support one temperature. This can be ideal if you don’t want the hassle of constantly adjusting the temperature on your straightening tool. But, if you have a hair type that requires more or less heat than the flat iron can emit, this would be a problem.
If you already know the perfect temperature required to style your hair, then this type of heat tool is ideal. If you are still experimenting to determine the right temperature, we recommend picking a flat iron that offers a range of temperatures. Some models are designed to allow you to precisely adjust the temperature to within five-degree increments (for Fahrenheit). Meanwhile, others will simply feature a handful of preset temperatures, which may be displayed as numerical figures or simply “high, medium, and low.”
Consider the Plates
This is a two-part factor that you need to think about before you settle on a flat iron. You need to determine the right width, length, and material that’s compatible with your styling habits and hair type.
Flat irons are sold based primarily on the plate width and are usually measured in inches. While the most popular option is a flat iron with one-inch-wide plates, you can find wider and narrower options. If you have very short hair (think a pixie haircut), a one-inch-wide flat iron may be too large to effectively style your hair. In this case, we would recommend a half-inch-wide flat iron.
Conversely, people with very long hair – or those who know they solely want to straighten their hair – can benefit from a 1.5- or two-inch-wide flat iron. These are ideal for thick and long hair, as well as working faster through a hair straightening session, thanks to the larger plates.
But also think about the plate materials. These days, you’re most likely to find ceramic plates. These are ideal for maintaining consistent heat and also ensure that the plate is smooth so it won’t snag at your hair. Ceramic is compatible and safe to use for most hair types.
Meanwhile, titanium heats up faster – but can pose a risk for people with fine or damaged hair since you might be exposed to more heat than intended. Titanium is usually ideal for people with long, very thick, or curly hair.
And finally, tourmaline is a great option for anyone concerned with frizz, as the material is ideal for generating negative ions, which help to smooth your hair as you style it. Note that you can also find combination plates that contain ceramic and tourmaline or titanium and tourmaline.
2. Hot Tools Work Best on Clean Hair
In news that should surprise no one, using a hot tool on dirty hair is not going to produce consistent results. Running a hair straightener through product-heavy hair can produce damage and leave you with a dirty flat iron.
As tempting as it is to just quickly pass your flat iron through day-two hair (or three- and four-day hair), don’t. Especially if you routinely use a significant amount of product, you could be damaging your strands.
3. Always Use a Heat Protectant
While you should always use hot tools on clean hair, you should also always use a heat protectant. Whether you opt for a spray or serum, this is the only product you should be putting in your hair before straightening or curling it.
A good heat protectant works to minimize how much heat is entering the hair shaft. This is important for all hair types, but especially for anyone with wavy, curly, or coily hair. For more textured hair types, heat damage manifests as pieces that no longer return to their original wave or curl pattern once washed. Avoid that by investing in a quality heat protectant.
4. Never Straighten Wet or Damp Hair
While there are flat irons that are promoted as safe to use on wet hair, most hair care experts will still recommend that you avoid them. They can appear convenient because you’re skipping the blow-dry step (or hair stretching step if you’re trying to minimize heat exposure).
But consider that a wet-dry flat iron causes significant amounts of steam to form as you run a piping hot tool through your wet tresses. The steam can cause the hair shaft to expand, encouraging breakage. If used very sparingly, the damage would be minimal. But if you constantly turn to a wet-dry flat iron every time you want to do your hair straight out of the shower, this can be a problem.
And the same goes for regular flat irons. They’re not designed to be used on wet or damp hair and will encourage breakage even with a single use.
5. Use Gloves If Needed
Flat irons are straightforward hot tools, but they’re not without a learning curve. Especially the first few times you’re using it, or if you’re attempting curls initially, invest in a heat protectant glove. This ensures you won’t accidentally touch your fingers on the plates.
6. Take Your Time
Using a flat iron is like a marathon, not a sprint. When you take your time, you’re more likely to get the desired results the first time. Rushing will almost always ensure that results are uneven and disappointing.
7. Routinely Clean Your Flat Iron
Even if you’re using a flat iron on clean hair, dirt can and will accumulate over time. This is why you need to periodically clean your flat iron. When it’s off and completely cool, run a damp cloth along the plates, being sure to clean any gunk that might be present on the edges. Follow up with a dry cloth to prevent damaging the plates.
Photos via @thedrybar, @t3micro, Instagram