If you have found yourself confused about what makeup brushes to go for and how to use each properly, I give the most thorough makeup brush guide imaginable. We detail all of the main makeup brush types, going over what they are, what kind of makeup they are for, and how to use them. We have a few extra tips and tricks that apply to all makeup brushes. Happy brushing!
In this article:
Main Types of Makeup Brushes
I’m not a big believer in rules, especially considering just how much has changed in the makeup world since I went to makeup school. While some makeup brushes are better suited to some applications than others, consider this a loose guideline.
Once you understand the basics of the shape of each brush and which materials it works best with, you will find it easier to break these rules to achieve a makeup technique that works best for you.
Foundation Brushes
• Flat-Top Foundation Brush
The modern-day foundation brush is a stiff yet soft synthetic brush with a rounded head and a flat top. It is a fairly large brush, though it is usually not as big as a powder or kabuki brush.
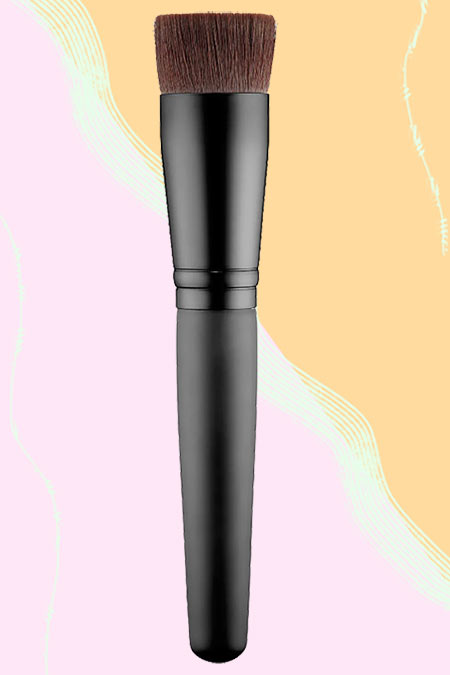
The bristles themselves tend to be straighter and firmer than the bristles of a powder brush. This kind of brush applies cream and liquid foundations beautifully, with a seamless finish and without any lines or streaks.
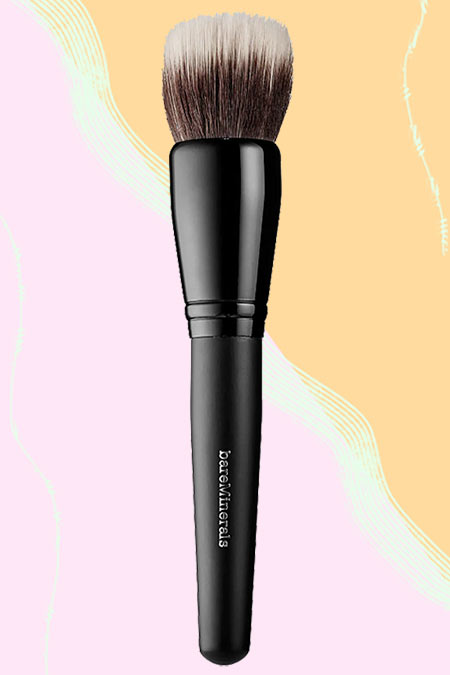
An oval foundation brush is actually just a variation on the typical flat-top foundation brush, with the main difference being the size of the head and the angle of the handle. Some brands might refer to it as a buffing brush or even as a kabuki brush, although that’s not quite right.
To use: You can use a foundation brush either by dispensing a bit of foundation directly on it or by dotting the foundation on the face first and then using the brush to blend and buff it out. To achieve a higher coverage, use the brush in a tapping or stippling motion. To blend or sheer out your foundation, use a circular, buffing motion to move the product around your face.
• Flat Foundation Brush
I think of this as the old-school foundation brush. It is a flat, synthetic brush with long, stiff bristles and a domed top. It is meant to be used sort of like a paint brush, with the flat side of the bristles coming in contact with the skin rather than the top of the bristles.
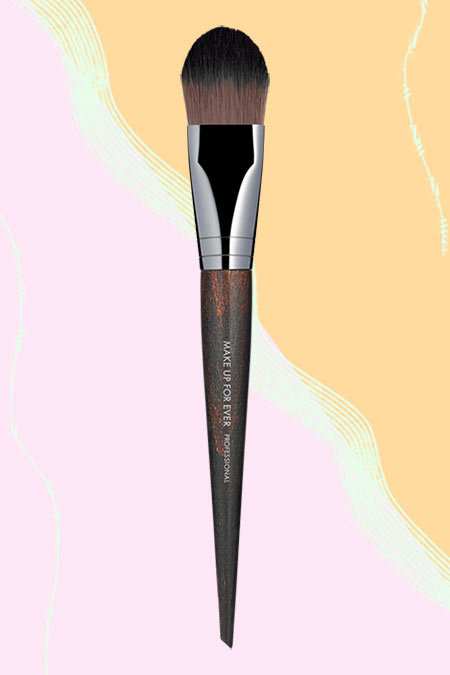
This type of brush has fallen out of favor in recent years because while it works for applying foundation it doesn’t blend it out, so a sponge is still necessary.
To use: If you do happen to own one of these makeup brushes you can still use it if you like. You can dispense foundation directly on the brush, and then tap it on the skin to transfer a large amount or drag it on in downward motions to sort of paint the skin with it. Use a damp sponge to blend out any streaks or visible brush strokes.
Tip: You can also use the slightly domed/ pointed tip of this brush to get a fine line of contour cream under your cheekbone or along the side of your nose.
• Dual-Fiber Stippling Brush
Before flat-topped makeup brushes popped on the market there was a brief period when dual-fiber brushes were the go-to makeup brushes for applying foundation seamlessly. The main difference between a dual-fiber and a flat-topped brush is that a dual-fiber brush is made of two types of bristles that are distributed evenly – there is a long layer of synthetic bristles and a shorter layer of natural bristles.
The synthetic bristles help apply the product, while the lower natural bristles help to buff it into the skin. While stippling brushes were definitely a step up from the flat foundation brushes, they were not quite as good as the modern flat-topped brush.
To use: Despite the name, straight up stippling doesn’t work super well with this brush. Once again, you can dispense the product directly on the brush, or dot it over your skin, and then use a circular buffing motion to move it around and sheer it out so it covers the face evenly.
Tip: You can also try it with powder products that are meant to go over the face sheerly, like glowy finishing powders or bronzers.
Powder Brushes
• Soft, Large Powder Brush
Large, soft powder brushes are basically the perfect thing for applying setting powder to the face. They usually have a rounded or domed tapered top though they can also be a bit more candle-shaped.
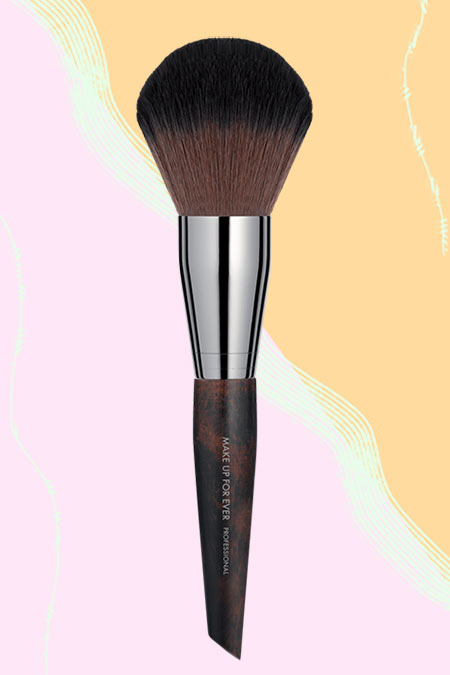
High-quality powder brushes feel soft, fluffy and luxurious when they touch the skin, so using them can be one of the most pleasant parts of the makeup application process. The softer and more yielding the brush, the less heavy a layer of powder it will dispense, so it is perfect for setting makeup without having it look cakey or overly matte. Most powder brushes on the market these days are synthetic, though historically they used to be made of animal hair.
To use: Swirl the brush in your powder container to load it up. Tap off the excess onto a tissue, and then use a tapping motion to apply the powder all over your face. The reason for the tapping motion is that you want to press the powder into the face. If you were to swipe the brush over the face you would end moving your unset foundation around, potentially removing it or causing streaking.
Reload the brush with powder if necessary. If you’ve overapplied powder, wipe the brush clean with a dry towel and then move it over your face in a circular buffing motion to remove the extra powder.
Tip: You can squeeze the bristles of the brush to get a narrower shape that will fit more easily along the sides of your nose. In a pinch, this can also allow you to apply blush or contour powder with the large brush.
• Kabuki Brush
A kabuki brush generally refers to a brush with a smaller handle (though this is not mandatory) and a large head. The bristles fan out in a round shape, with either a very slight dome or a totally flat top.

While soft to the touch, these makeup brushes tend to be firmer than traditional large powder brushes. They are often bigger in size, as well, and are able to cover more space. A kabuki brush will dispense more powder onto the face, so it sets cream products more thoroughly and gives a more matte finish.
To use: Just like with a regular powder brush, swirl the kabuki brush through the powder, tap off the excess, and then using a tapping motion apply the powder to the skin. Use a softer powder brush to remove excess powder, if necessary.
Other Complexion Brushes
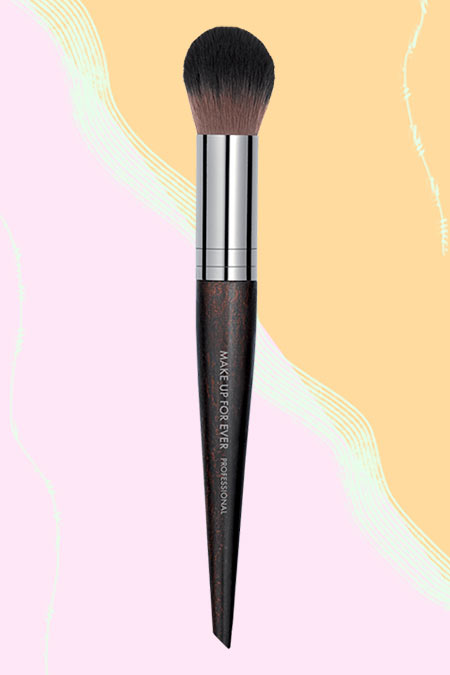
• Soft Medium-Sized Brush
Imagine a smaller version of your typical powder brush. Because of their size, medium powder brushes are better for applying more localized powder products like blush, highlighter, bronzer or contour powder but in a light, diffused manner.

You can use the same brush for all of these products as long as you clean it in-between, though for most it’s easier to have one brush per product category. When I travel I save space by using one medium brush for contour and another medium brush for both blush and highlighter.
To use: It’s important that your foundation is already set before you start, or you risk having the brush drag on your foundation and cause streaking. Swirl the brush into your product of choice and brush it on. Go over the area with your larger powder brush in a circular motion to blend.
Your highlighter should go on the top of the apples of the cheeks and dragged up towards the temple (you can also lightly diffuse it over the center of the forehead and above the lip), blush should go slightly below the highlight on the apple of the cheeks and towards the temples, and a contour should be applied below the cheekbone from the center of the ear to just below the apple of the cheek.
You can also apply the contour with the medium brush below the jawline and along the perimeter of the forehead.
Tip: Medium brushes are also better for applying mineral powder foundations, since they allow a bit more control than their larger counterparts but still don’t dispense as much product as a firm brush.
• Fan Brush
The fan brush is even softer and has an even lighter touch than your softest traditional round powder brush. The bristles of this brush fan out from the ferrule (the metal part that holds the bristles together) into the shape of… well, a fan.
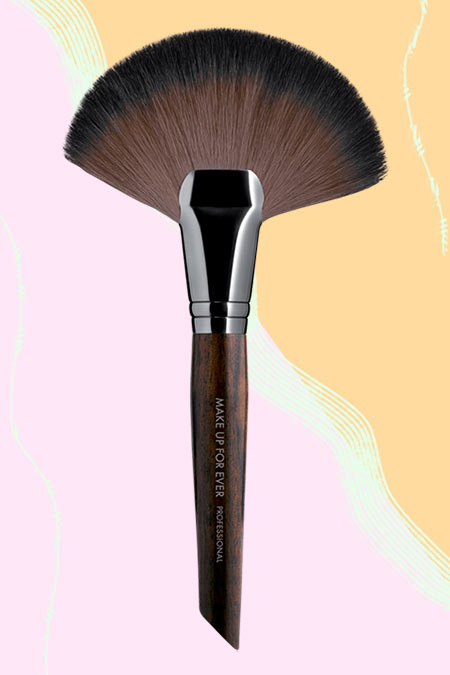
As a result, the super soft bristles are not sitting too densely next to each other so they apply powder products very lightly and softly. This is great for applying a very natural wash of highlighter, bronzer or blush, especially if you usually have a heavy hand or if you don’t have time to blend things out.
To use: Using a fan brush is quite simple, since all you have to do is swirl and brush. Make sure to use the length of the brush by holding its top part parallel to your cheekbone when applying. This will allow you to really optimize your application and to cover a lot of space as quickly as possible.
• Firm Medium-Sized Brush
The medium-sized firm brush is nearly identical to the soft medium-sized brush, with one key difference: it’s a little bit firmer. Occasionally these types of makeup brushes will also have a flatter top, though not always. A firm brush will deposit more product on the skin, so it’s better for products that you want to go on more saturated.
Personally, I prefer a firmer contour brush, though others might prefer a firmer highlighter brush, for example. Firmer brushes also tend to work better with cream products of various types, assuming they are synthetic.
To use: For powder products, use the firm medium-sized brush the same way you would a softer one. For cream products, it is better to do the application either before or after applying foundation but definitely before setting the foundation with powder. Use a tapping or gentle brushing motion to dispense more product and follow it up with a circular motion to buff out and blend.
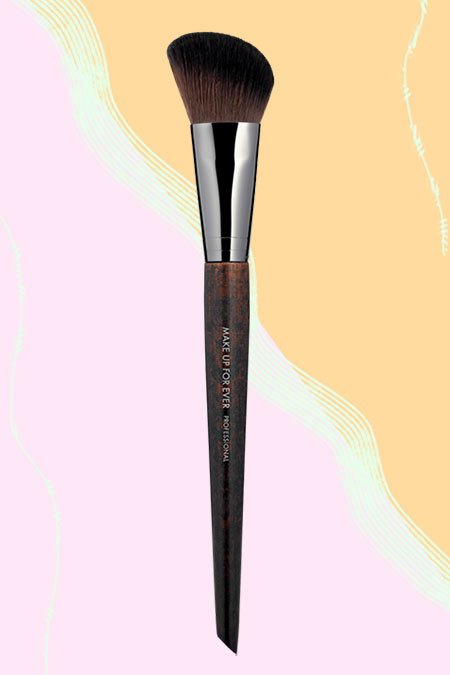
• Angled Powder Brush
An angled powder brush is very similar to a regular medium-sized blush/ contour brush, with the main difference being that its bristles get gradually longer from one side to the other so that the brush is angled and the top will have a slightly narrow and long shape. This makes the brush seem a little sharper and it allows it to cover a narrow space with a shorter swipe, which is why it’s ideal for contouring. It can also work for applying blush and highlighter.
To use: Swirl it in the powder, tap off the excess, and brush it on, just as you would with other medium-sized brushes. Make sure to use the length of the brush to your advantage.
Lipstick and Concealer Brushes
• Flat Concealer Brush
A flat concealer brush looks a lot like a smaller version of a flat foundation brush, with the same straight bristles that intentionally look and feel synthetic. It is best for applying cream products, with its primary intended purpose being for applying concealer, though it’ll also work with eyeshadow primer, lipstick, or cream contour/ highlighter.
It is large enough to easily apply under-eye concealer but also small enough to do more detailed work. These days, many popular concealers come with an applicator attached to the lid, but when that’s not the case a concealer brush can be extremely useful.
To use: Dip your brush into the concealer tin or apply a few drops of concealer directly on the brush. Wipe it over the back of your arm or on a metal palette just to make sure the product is evenly distributed on the brush. To cover blemishes or spots tap the flat side of the brush over the specific spot, and then blend the edges either with a sponge or with the tip of the brush.
To apply your cream product over larger areas, use more of a brush motion to dispense and move product, and then use the tapping motion to diffuse streaks or lines.
Tip: Use your concealer brush to create an outer perimeter line for your lips, which will act as a guide for your lip liner and lipstick and will also prevent bleeding. Alternatively, use the brush and a bit of concealer to help fix any lip liner or eyeliner mistakes and to sharpen those lines.
• Tiny Concealer/ Lip Brush
A tiny lip or concealer brush is an even smaller version of the flat concealer brush. It is much easier to work with if the primary thing you’re trying to conceal is super small pimples, and it is also fabulous for applying lipstick – it’s small enough that it’ll allow you to line the lips flawlessly.
Some brushes may be marketed specifically for concealer, while others will be marketing specifically for lipstick, but functionally they are indistinguishable.
To use: As with a larger concealer brush, load it up with makeup and then either tap it on to deposit a maximum amount of product or brush it over the skin to deposit a lighter layer and move it around.
• Buffing Concealer Brush
A buffing concealer brush is like a smaller version of a buffing foundation brush, with shorter bristles and a flat top or slightly angled top. This brush’s main purpose is to blend out concealer and ensure it has a very even, smooth finish, whereas a flat concealer brush is primarily meant to deposit the concealer on the skin.
The action of this kind of brush is comparable to that of a makeup sponge. Some brushes are somewhere in between the two designs, so they are fatter than a flat concealer brush but still have some room for applications with the side or for blending with the top. Beyond concealer, a buffing concealer brush is also great for applying cream blush, contour or highlight.
To use: Dot the concealer over the skin first or deposit a small amount of it on the brush. Tap it against the skin to deposit product and use a gentle circular motion to blend and buff out.
Eye Brushes
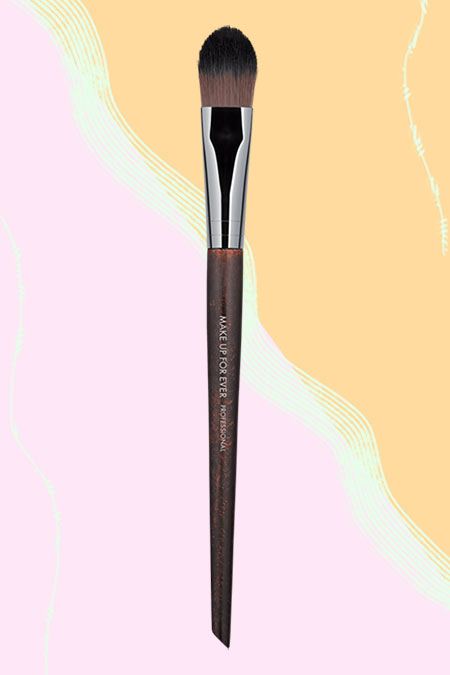
• Flat Eyeshadow Brush
Lid brushes are flat eyeshadow brushes that stand out as one of the few brush styles where the flat side of the bristles is the part that comes into contact with the skin. These makeup brushes are perfect for covering a lot of space and really packing on product.
Their size tends to be just right for totally covering the eyelid with just two or three presses, allowing for a quick lid color application. Their tops tend to be rounded, which prevents harsh lines on the eye and saves you some blending work.
To use: Tap or pat the side of the brush into your eyeshadow of choice. Apply the eyeshadow to your lid by pressing or tapping the brush against it. Use the top of the brush to blend out the edges or to apply the shadow under the lower lash line.
Tip: Dampen your eyeshadow brush with water or a setting spray before using it to apply loose eyeshadow pigments. This will prevent fall-out under the eye and will also help intensify the color.
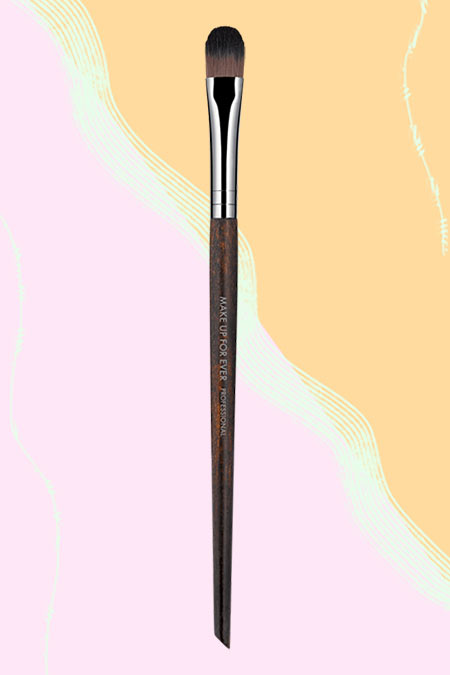
• Eye Highlighter Brush
An eye highlighting brush is a smaller version of a flat lid brush that is often a little fluffier and less firm, though it’s still mostly flat with a rounded top. This brush is small enough to easily fit into the inner corner of the eye and apply highlight, and it also works well for highlighting under the brow.
If you have very small eyelids or if you like to create complex eyeshadow looks with multiple colors on the eyelid, then you will find this makeup brush easier to control. It is also great for any kind of detail work that is done with powder, like applying highlighting powder to the top of the nose.
To use: Load the brush up with powder by tapping or patting it over the product, and then use a tapping motion to apply it to the inner corner of the eye. Move the color around and blend it with a light brushing or pulling motion.
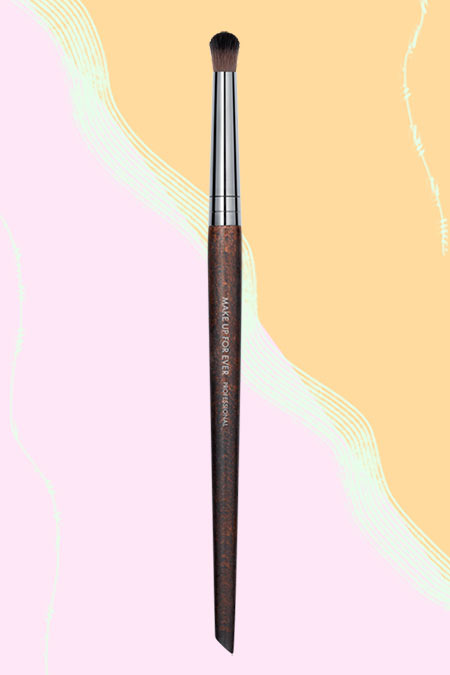
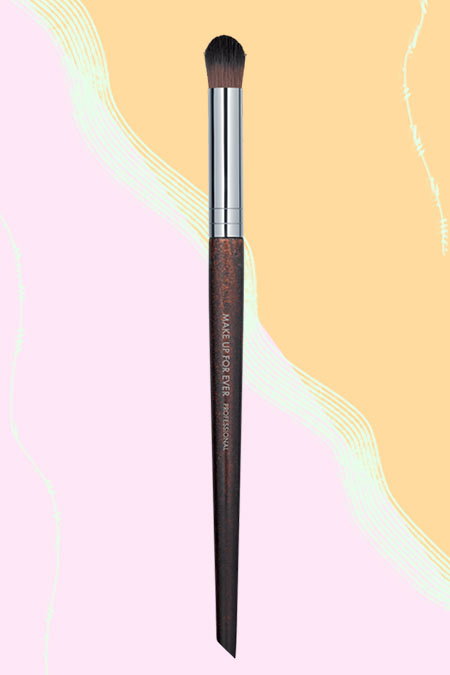
• Round Crease Brush
This unique eyeshadow brush has a cylindrical shape that makes it absolutely perfect for applying darker eyeshadows in the crease and outer corner of the eye. It is at the exact level of firmness for both depositing and blending eyeshadow, and its size is ideal for most eye shapes.
To use: Load up the top of the brush with eyeshadow, and tap off the excess. To deposit a lot of color, use a tapping motion to apply, or use a brushing motion to get it on and move it around. The classic shape for applying would be in a V at the outer corner of the eye and then in a windshield wiper motion over the crease, though of course this totally depends on the type of makeup look you’re creating.
Tip: Use a clean crease brush as a blending brush for very delicate or dark makeup looks where a large blending brush can be too bulky.
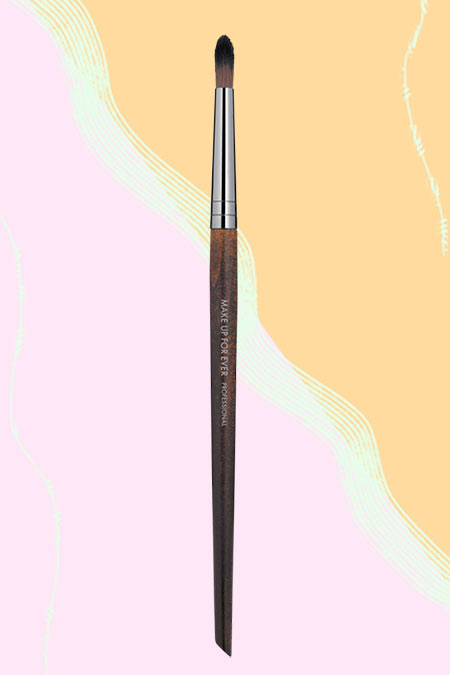
• Pencil Brush
A pencil brush looks a little bit like a crease brush but it is smaller and more pointed. Pencil brushes don’t have a clearly defined role, but they can work in a few ways.
Because they are pointed, these makeup brushes can give a very precise application of highlighting eyeshadow. They can also be used to smoke out eyeliner or to apply a thin line of dark eyeshadow to the lower lash line.
If you have very little space above your eyelid then you might find you prefer this smaller brush for applying eyeshadow to the crease or to the outer corner of the eye. In a pinch it would also work for filling in the brows, and could probably double as a concealer or lipstick brush.
• Soft Blending Brush
A soft blending brush has a lot of uses. The primary one, of course, is to blend eyeshadows together so they look more diffused and without any harsh lines. Softer blending brushes don’t pull on shadows as much as firmer ones, so their blending effect tends to be softer but also harder to control. As a result, they work best with light and medium eyeshadows.
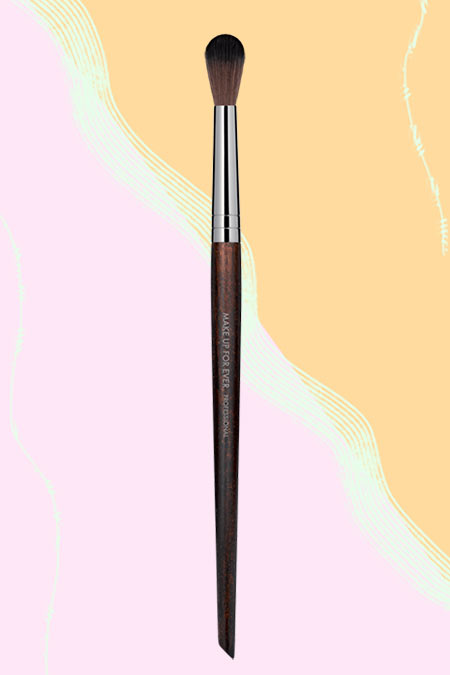
Soft blending brushes can also work for applying setting powder or base eyeshadow all over the eye to set concealer or eye primer. They can be used to set the under-eye area, or any other spots that are hard to reach with a larger powder brush. Lastly, it can be used to apply blush or highlighter, especially for people who have a smaller face or more delicate features.
To use: To blend with this brush, use it either when it’s clean or when it’s loaded up with a transition shade. Work it over the area you would like to blend in either small circular motions for delicate work or in a back and forth motion for intense, all-over blending.
• Firm Blending Brush
Firm blending brushes are similar to the softer ones, but their bristles tend to be a little shorter and more tightly packed. As a result, they move color around a little bit more and blend more strongly.
They are great for toning down the intensity of dark eyeshadows, and because they are packed tighter, they allow for a lot of control around edges. Like their softer counterparts, they can be used to set crevices as well as apply base colors to the lid, but just be aware that they will deposit the color more densely than their softer counterparts.
Because they are firm, they also work quite well with cream products, both for applying and for blending. This can include liquid eyeshadows as well as contour creams. This kind of brush can also work for applying medium tones to the crease, especially if you have a bit more lid space, and a regular crease brush is too small.
To use: Blend with this brush like you would with a softer blending brush, by using a softer circular motion or by moving it back and forth.
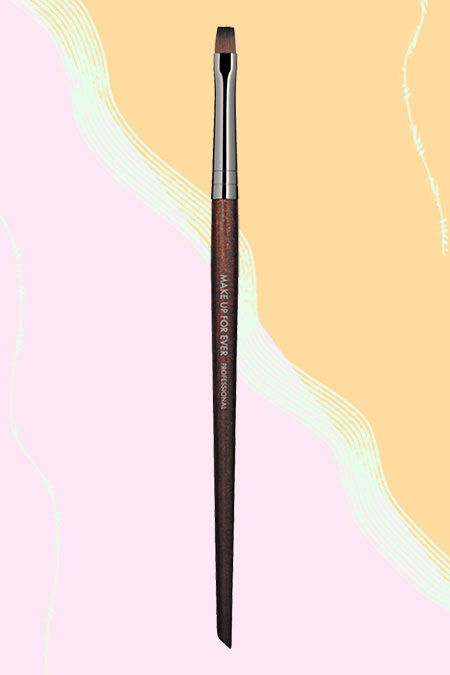
• Small Angle Brush
Small angle brushes are thin and narrow makeup brushes with an angled top. They are sometimes referred to as eyebrow brushes or angled eyeliner brushes, since they can work beautifully for both purposes.
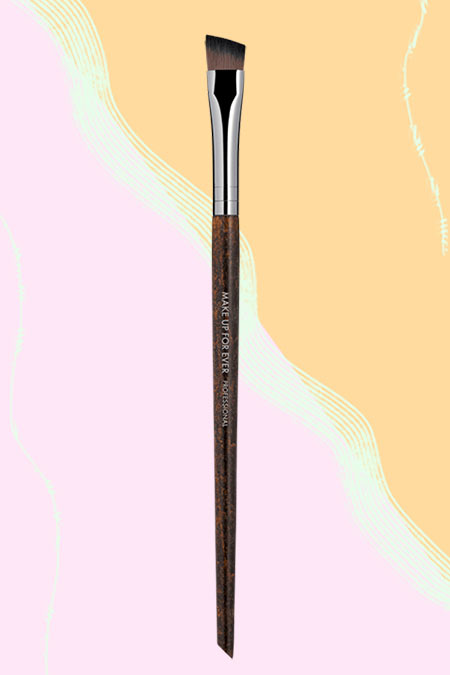
Angle brushes work with both cream and powder products to fill in the brows, line the eyes, or for any other work that requires careful lines. You can also use them to smudge or smoke out eyeliner, much like with a pencil liner. Personally, I love using angle brushes for carving out a V at the outer corner of the eye with eyeshadow, and then using a pencil or crease brush to blend it out a bit.
To use: Angle brushes allow for a ton of control so you can use them to apply makeup in one straight line or in small strokes depending on the part of the face you’re making up and the effect you would like. You can use small strokes to mimic hairs on your brows, or use it to totally fill in the brows instead.
If you’re using an angle brush to apply eyeliner, it is better to stick to smaller strokes near the lashes and then switch to brushing on a longer line when doing the wing or the top part of the liner.
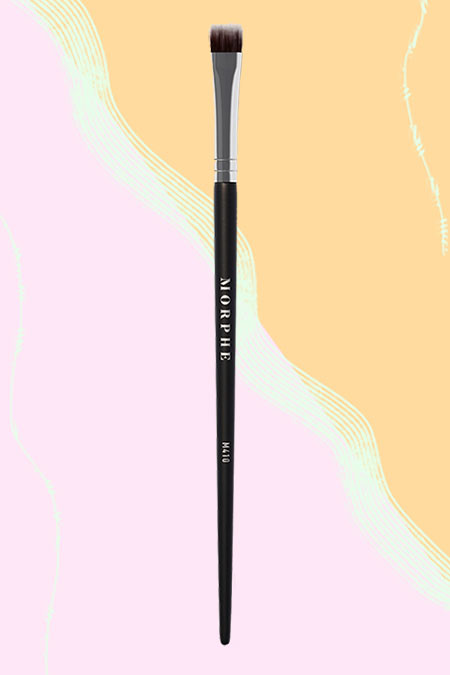
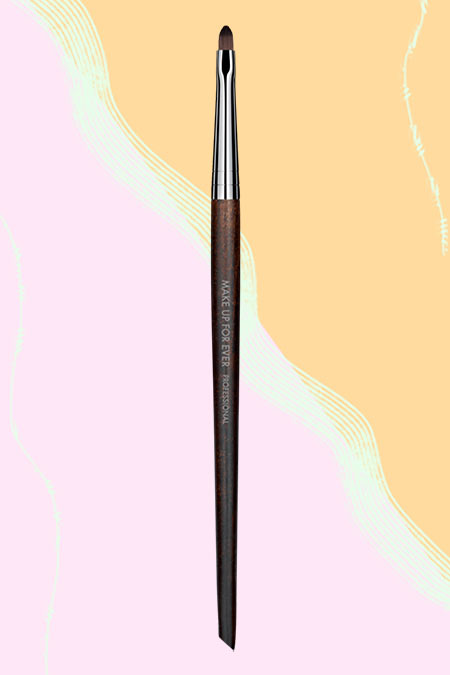
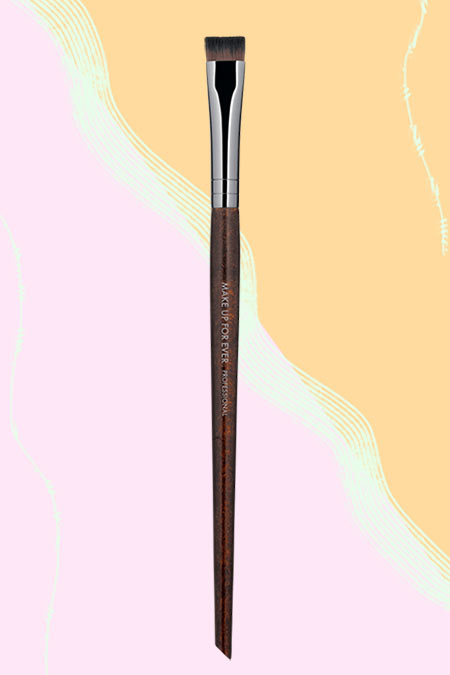
• Straight Brush
A straight eye brush is basically the same as angle brush, except without the angle. It can be used for the same purposes as an angle brush, and you may find it more comfortable to work with if your eyes are not particularly curved. Use it exactly as you would an angle brush.
• Eyeliner Brush
While small angle brushes may sometimes be referred to as an eyeliner brush, the true eyeliner brush is a small brush with only a few bristles that come together to make a pointy, fine tip. Depending on the way you apply your eyeliner, you might prefer this kind of eyeliner brush or you might prefer an angled one.

The thin eyeliner brush is ideal very precise applications of gel or powder eyeliner, since its fine tip allows for a very thin line and a sharper wing – even thinner than what you can achieve with an angle brush.
To use: Much like with an angle brush, you want to use smaller, overlapping strokes when applying eyeliner very close to the lash line. Use a smooth, single stroke when working on the wing or on the top part of the liner.
Tip: For some, an eyeliner brush with a ferrule that is slightly bent is ideal since it allows for a better angle, especially if you’re applying your eyeliner in front of a large hanging mirror.
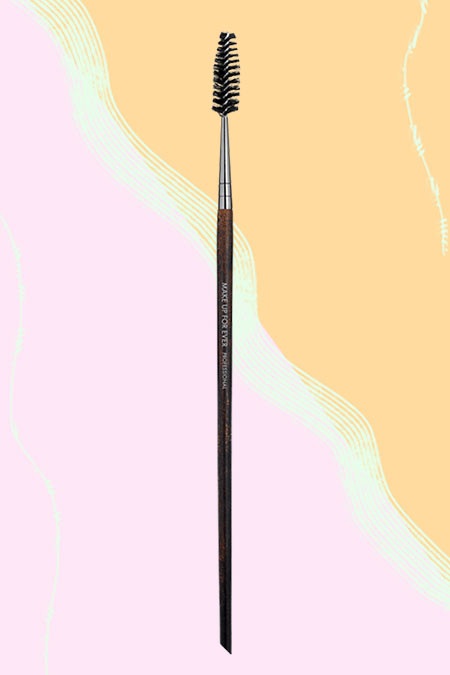
• Spoolie
It is not clear whether a spoolie counts as a makeup brush or not, but you still might find one on one end of your angle brush, or you might get one in a makeup kit. A spoolie is essentially a clean mascara wand, and it shouldn’t be used to apply products.
Instead, use your spoolie to brush your eyebrows after you’ve finished filling them in, or use it to comb your lashes to separate them out both before and after your mascara application.
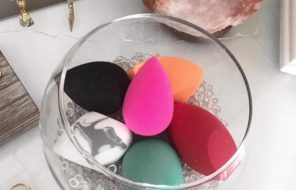
Makeup Brushes vs. Makeup Sponges
A lot of the work that some of these makeup brushes do can also be done by a sponge – that is undeniable. This is especially true when it comes to more high-quality sponges like the Beauty Blender, which works for applying both cream and powder makeup products.
In a pinch, you could probably do your whole face with just one or two Beauty Blenders, but the question here is which will give you the best makeup application.
Quick refresher: high-quality makeup sponges are used damp, to give a really flawless finish to cream products and to deposit high amounts of powder products. Because they are used damp they don’t absorb too much product and they are also able to keep cream products a little moister, which keeps the skin looking more hydrated.
Personally, I don’t find sponges great for depositing product on the skin because they don’t give a lot of control. I prefer applying foundation and concealer with a brush that has a handle or even with my fingers.
I do love using the Beauty Blender afterwards to sheer out and blend the product. A buffing foundation brush could certainly give you the same seamless finish, but I love that the Beauty Blender also adds hydration and luminosity to the look.
When it comes to powders, even firmer brushes will deposit less product on the skin than a damp sponge will. Since I prefer a more luminous finish I definitely prefer applying setting powders with a soft brush, though on rainy days and when I’m feeling a little oily I will use a firm brush instead.
If you have very oily skin or you love a very matte finish, you might choose to set your foundation with a sponge. You might also find that you like to set some parts of your face with the help of the sponge, and other parts with a powder brush.
I highly recommend that you play around and try both makeup brushes and sponges for various applications, so you can find out what works best for you.
Makeup Brush Tips & Common Mistakes to Avoid
- The motions you use when applying makeup matter just as much as the makeup brush. Remember that tapping will deposit product, while brushing will move it around. Circular brushing will help blend and sheer out makeup.
- You’re allowed to use artist brushes as makeup brushes, as long as you wash them first! They don’t tend to look as elegant as traditional makeup brushes, but they can work beautifully. One of my favorite blending brushes was a super soft and very yielding squirrel hair brush that I bought at an art store, for example!
- Use the size and shape of your brush to your favor! Don’t try to apply lid eyeshadow with the fine tip of a brush and don’t try to apply a thin line of nose contour with a big blush brush. The surface of your brush should be about the same size as the surface to which you’re applying makeup.
- You can squeeze the head of your makeup brush in order to force it to conform to a particular facial feature. For example, by squeezing a powder brush into a longer and narrower shape you can use it to apply a sharper line of contour powder.
- Remember to control your pressure, and to start off gentle. Using more pressure when applying products will deposit more on your skin while using more pressure while blending will take more product off, so remember to adjust your pressure slowly and gently until you achieve the effect you want.
- Don’t throw your makeup brushes around! Because they come into contact with your face it’s important to store them somewhere clean where they’ll be safe from pets and children.
- Don’t forget to clean your makeup brushes regularly! Check out our guide to cleaning makeup brushes to learn what methods I suggest for cleaning your brushes well without damaging them or having to buy expensive brush cleaners.
- If you’ve just cleaned your makeup brushes, don’t leave them side up when they are damp or the water will get into the ferrule and loosen the glue holding the bristles together.
- If you find your hand hurts from hold brushes that are too small, pop into the office supply shop and pick up some cushioned pencil grips. They will make your brush handle more ergonomic and may even save you some lifelong issues. You can also find some cool options on Amazon.
Photos via @kenzas, Instagram, Sephora